Mount Twelve Panels On A Roof
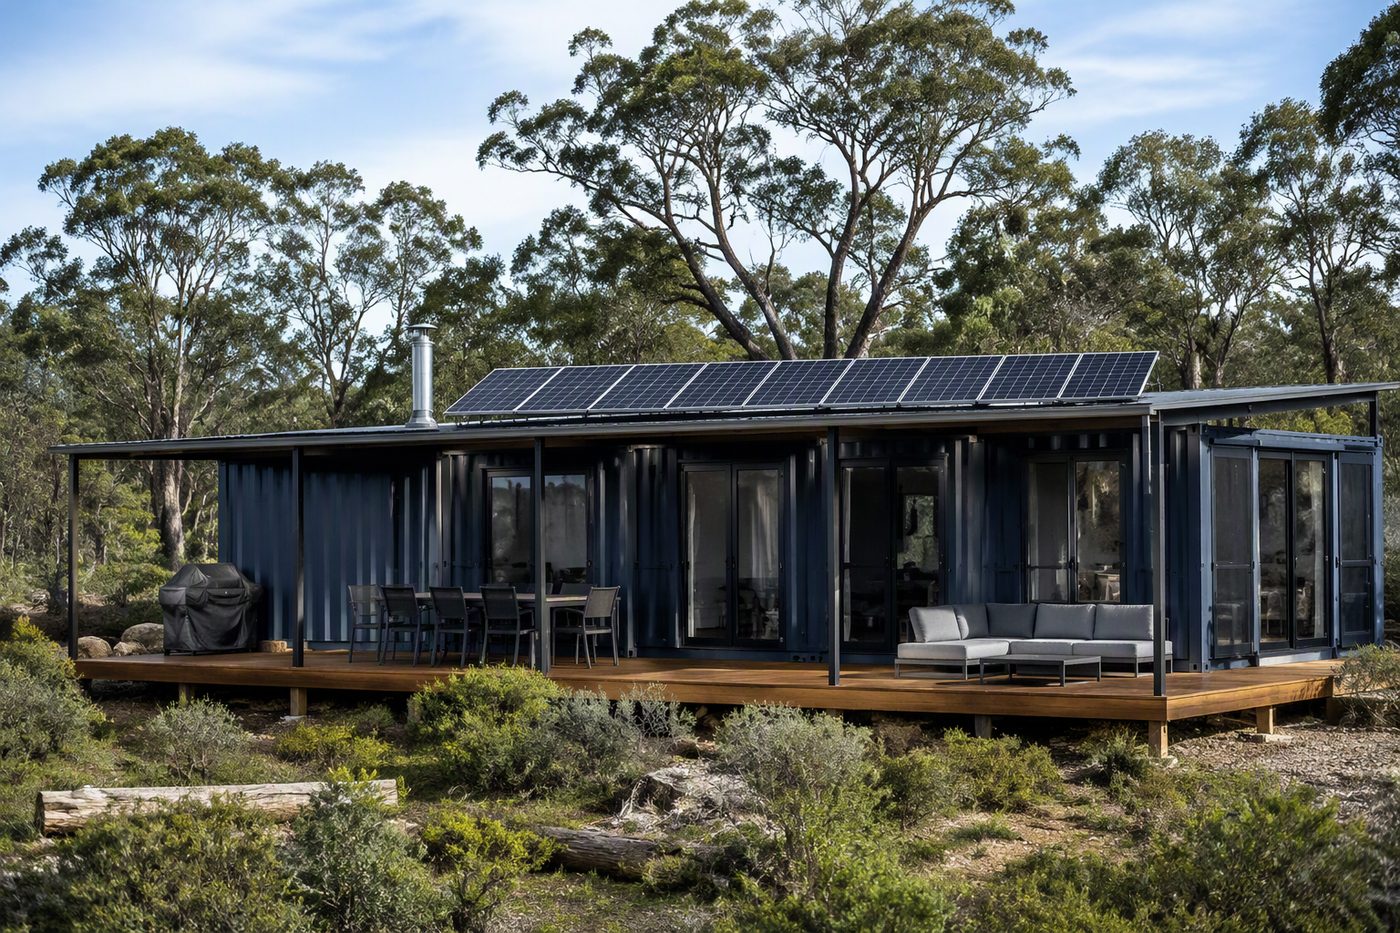
If you buy panels at a pallet rate, a decent 390 W monocrystalline panel runs $180–220 AUD each around Toowoomba or Rockhampton in 2025. Twelve of them land on a 20-foot container roof without overhang. That gives 4.68 kW nameplate, which on a spring day in central Queensland with full sun delivers 22–24 kWh into the batteries when you wire them in two strings of six into a 150 V MPPT. Mount them on 41x41 Unistrut channel bolted to the container’s corner castings, not through the thin roof skin.
Secure Mounting With Proper Torque
A 15 mm gap between strut and rib stops heat build-up that would otherwise bake the panel junction boxes. Use M8 stainless bolts, flat washers, and Nyloc nuts. One gusty afternoon I saw a neighbour’s tilt frame lift because he skipped the split washers – the entire array pitched forward into a fence and sheared two MC4 connectors clean off. Torque everything to 20 N·m and check it again after the first hot week.
Wire Array To MPPT Controller
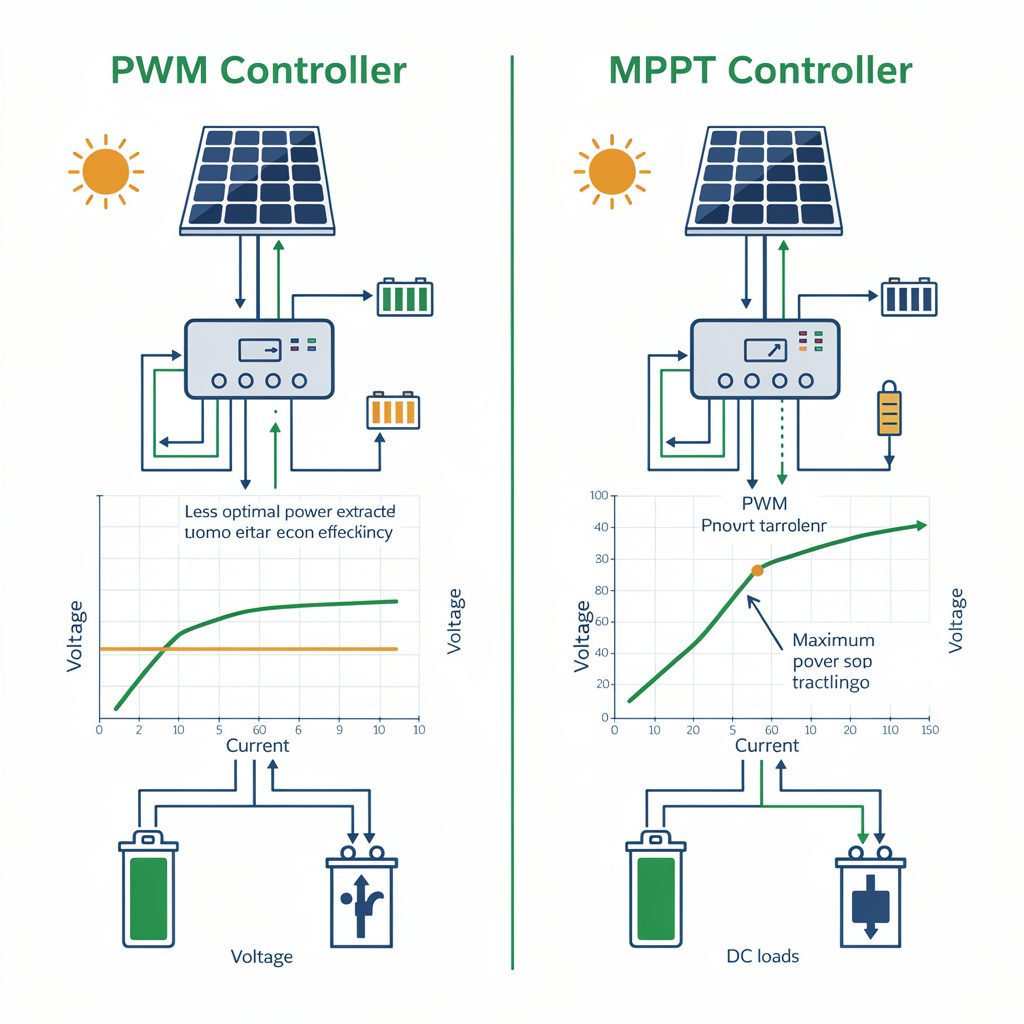
Wire the array to a DC isolator on the north- or east-facing wall of the container, then into a 250 V / 100 A MPPT charge controller. Victron SmartSolar 250/100 and Morningstar TriStar PWM are both common out here, but with 48 V battery banks the MPPT pulls about 96 A in bulk, so a 100 A unit is not oversized. Price for that MPPT lands around $1,100–1,300 AUD. Fuse each string at the combiner box with a 15 A DC-rated breaker.
Selecting Safe Batteries For Heat
Your panels can push 10.5 A short-circuit each, so a 15 A breaker holds normal current but trips if a string backfeeds a short. For batteries in a container home under a tin roof that hits 55 °C inside if you leave the door shut, lithium iron phosphate is the only chemistry I use. AGM cook in a season. A 10 kWh rack of Pylontech US5000 or another 48 V LiFePO₄ pack costs $5,000–$6,000 AUD and weighs around 85 kg.
Secure Battery Mounting And Protection
Mount the rack on the container floor with rubber isolators and strap it to the wall with a 5 mm steel bar. The BMS can disconnect at low voltage within 200 ms, but I still fit a 160 A, DC-rated main battery fuse and a contactor that kills the whole DC bus if the BMS signals a fault. A Victron Lynx Shunt with a 1000 A rating goes for $350–$400 and gives you proper coul
Off-Grid Solar Made Simple: Container Home Power System Install
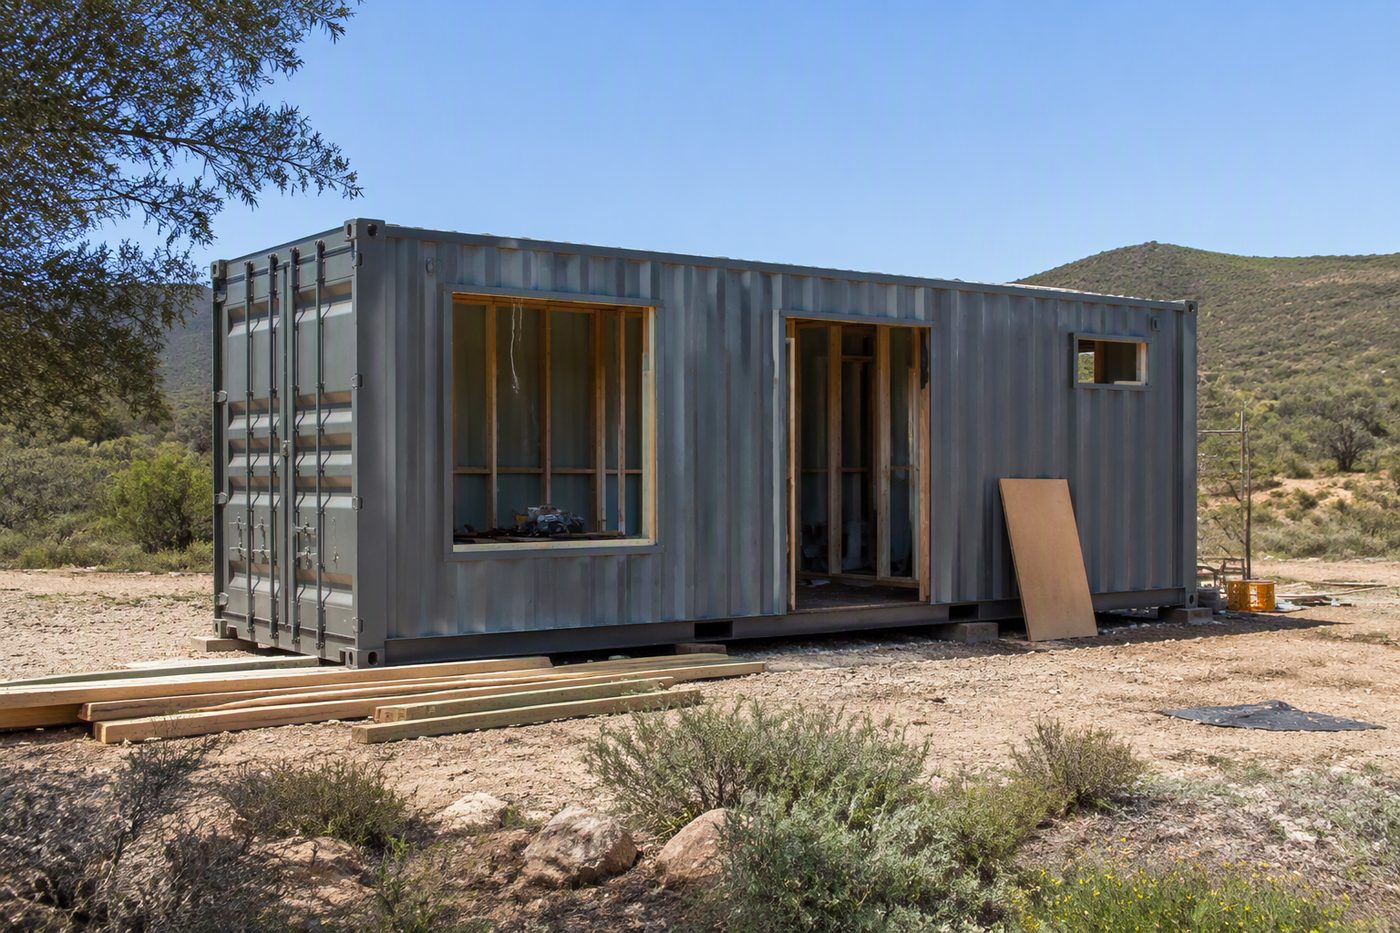
Saw a build from the Longneckers over at Tiny Shiny Home that cuts through the usual paralysis. Jonathan and Ashley have been knocking together off-grid homesteads for years, so when they put a rehabbed shipping container on their place as a goat barn for their daughter, they didn’t muck about. The box got a fully equipped milking room, a mini-split air conditioning unit, and a fridge — all running off a tidy 3kW, 5kWh, 120V solar system.
Australian 230V Inverter Options
The 120V part is pure American; out here in central Queensland we’d be wiring 230V single-phase, but the bones of the setup translate to a shed, a donga, or a weekender just fine. A 3kW inverter/charger with that kind of surge capacity runs $1,500–$2,200 AUD if you walk into a Brisbane solar wholesaler — something like a Victron MultiPlus 3000VA, which weighs about 18 kg and fits on a sheet of 17 mm formply screwed to the container wall.
Battery And Solar Panel Costs
The 5kWh battery bank, if it’s lithium iron phosphate, will be a single rack-mount unit or a pair of 2.5kWh bricks the size of a small car battery, costing $2,600–$3,500 depending on whether you go with a known brand with a BMS that talks to the inverter or a cheaper drop-in. Solar panels for a 3kW array — nine 330W–350W panels, each about 1.7 m by 1 m — would add $1,800–$2,400, plus aluminium rail and mid clamps.
Real Costs Of Off Grid
That’s real money: a system like this, with proper DC breakers, cable, lugs, and a morning’s hire of a hydraulic crimper, lands between $7,000 and $9,000 on the ute tray before you wire a single GPO. Mounting panels on a shipping container roof in the paddock means Unistrut and stainless bolts, not magnets. I’ve watched a bloke lose a 250W panel when a gust got under it because he used four magnets and a prayer
Modular Victron And Sok System
What makes this install worth studying is that they did not reach for a cheap all-in-one unit. They went fully modular with Victron Energy components, a SOK rack battery, and IronRidge mounting — and then documented every wire, every setting, and every lesson learned. This guide walks you through the full system, what each component does, and how to apply it to your own Australian build.
Credit: This article is based on the Tiny Shiny Home YouTube video and companion article at tinyshinyhome.com. We are a fan channel, not affiliated.
Why Modular Components Matter
The Longneckers went the cheap route first on their 10 kW, 28 kWh homestead system, and what happened in their paddock west of Rockhampton is the reason this container job doesn’t touch an all-in-one inverter-charger off Amazon. They bought a pair of no-name 5 kW inverter-chargers that, linked for 10 kW, cost $1,840 total with freight to a depot in Emerald. The 28 kWh battery bank—four 7.
Replacing Cheap Inverters
Out here in central Queensland, a cheap all-in-one inverter/charger will set you back $600 to $800 from a roadhouse or online. When a bank of capacitors dries out after a couple of 45‑degree summers, or the cooling fan packs it in with red bulldust, you usually replace the whole unit. I’ve pulled one apart on the bench at Winton. The display still glowed, but the mainboard was cooked. Nothing inside was separately serviceable, and the importer had no spares. That’s an $800 doorstop. A modular system costs more up front.
Reliability In Harsh Australian Conditions
A Victron MultiPlus‑II 48/5000/70 retails for around $2,200 at any Australian solar wholesaler. A separate Victron MPPT 150/35 charge controller adds another $370. You’re paying for steel‑cased boxes that can handle 95% humidity in a shipping container near Townsville and still start on a 2‑degree morning at Blackall without a sulk. When one component fails in a modular system, you replace that one box. I keep a spare MPPT on the shelf in the shed—two bolts, four cable lugs, and you’re back running while the dead one goes to Brisbane for a board swap.
Modular Design Simplifies Fault Isolation
Your inverter, battery monitor, and Cerbo GX keep doing their job. Cause and effect is simple: a single‑board all‑in‑one turns a blown MOSFET into a system‑wide outage; a rack of separate devices puts the fault in a corner you can isolate. The Victron ecosystem also brings genuinely excellent remote monitoring software (VRM Portal). Stick a 4G dongle or a Starlink connection into the Cerbo GX, and you can sit in a pub in Longreach and see every amp coming off the solar array, every degree of battery temperature, and whether the generator auto‑start kicked in.
Worth Knowing
That same communication bus—VE.Can, VE.Direct, and Bluetooth—means a wide range of compatible devices that all talk to each other out of the box. A BMV‑712 battery monitor, a SmartSolar MPPT, a MultiPlus, and a Cerbo just work without an IT degree. That’s not a sales pitch; it’s what stops a farmer driving two hours back to the block because the “fault light” could mean anything.
Local Victron Distributors Deliver Quickly
Victron gear is readily available through local distributors like National Solar & Electrical (NSE), AM Solar, and Custom Power Australia. I’ve ordered a MultiPlus-II 48/3000/35‑50 from NSE in Brisbane on a Monday and had the pallet on the veranda of a shed outside Augathella by Wednesday afternoon — stock permitting, that’s standard courier behaviour, not a miracle. The same cannot be said for a budget inverter.
Premium Units Offer Reliability
It is more expensive upfront than a budget unit: a Victron 3 kVA inverter/charger commonly lands between $2,300 and $2,500 from those outlets, while a no‑name 3 kW pure‑sine‑wave box often sells for under $600. For a permanent off‑grid install, the reliability and supportability argument is strong. Inside a 50 °C containerised power room, the Victron’s toroidal transformer handles a 1.5 kW bore pump start without a flicker; the MOSFETs in a cheap unit let go after a few dozen cycles.
Reliable Victron Parts Delivery
When red bulldust clogs a budget inverter’s fan, you pull it off the wall, courier it somewhere, and run the generator for a fortnight. With the Victron supply chain, you ring AM Solar in Perth or Custom Power Australia in Cairns and a replacement control board or fan assembly is on a truck that night — no firmware hacking, no adaptor boards, just a plug‑and‑play fix that gets the shed back on solar before the beer gets warm. That local
The System at a Glance
Up on the roof of their 40‑foot high‑cube container they bolted six 415‑watt monocrystalline panels. The panels are standard residential size, roughly 1.7 by 1.1 metres, and each one tips the scales at about 21 kg. They paid $185 a panel at the local electrical wholesaler in Rockhampton, which works out to $1110 for the six. The frames sit on aluminium UniStrut rail bedded on rubber isolation pads to cut galvanic corrosion and noise, with the rail through‑bolted into the container’s top rail flanges using M10 stainless hardware and Nyloc nuts.
Central Queensland Solar Array
At that tilt in central Queensland, around 22 degrees latitude, these panels regularly punch out 2.5 kW of combined DC on a clear winter day. The DC cabling leaves the array via a single string into a roof‑mounted Isotec weatherproof gland, runs down a 50 mm conduit fixed to the container wall, and enters a 100‑amp DC isolator just above the inverter.
Proper Connector Crimping And Sealing
Every panel lead got an MC4 connector crimped with a proper ratchet tool, then a wrap of glue‑lined heat shrink over the join before the connector was locked; I’ve pulled apart too many connector joins where moisture wicked up the strands and turned the copper black. Inside the shed they hung a 5 kVA Victron MultiPlus‑II inverter‑charger on a plywood backing board using six coach screws into the container’s steel corner castings. That unit retails around $3200 and gives them a 70‑amp AC transfer switch and pure sine wave output—big enough to start a 1.5‑horsepower bore pump without tripping.
Pylontech Battery Bank And Cerbo GX
Below it, two Pylontech US5000 4.8 kWh lithium batteries sit on a dedicated steel stand. Those batteries cost $1850 each, so $3700 for the pair, giving them 9.6 kWh of usable storage with a 95% depth of discharge. Battery comms cables run to a Cerbo GX controller ($500) so the state of charge drives the inverter’s charge logic rather than voltage alone.
AC Switchgear And Generator Setup
All the AC switchgear lives in a 12‑pole Clipsal enclosure with a main breaker, RCBOs for the container’s circuits, and a generator changeover switch, fed by a 6 mm² SDI flex cable run in kopex to a 15‑amp caravan inlet on the container’s wall. When the grid is a long way off and the generator kicks in, the MultiPlus uses its 70‑amp relay to blend generator power with battery inrush smoothing, which stops the generator from hunting under light load.
The whole system, including wiring, breakers, earthing stake, and sundries like copper busbars and lugs, came to an even $11,400 in parts. That price stings once, then you don’t pay a cent for electrons for about two decades.
- The array on the container roof is 3,000 W of solar panels—12 used 250 W SanTan Solar polycrystalline modules, arranged in a 6S2P configuration. That means six panels in series to build string voltage, then two of those strings paralleled into a combiner box. Each panel measures roughly 1.65 m by 1 m and weighs around 18 kg, which matters when you’re muscling them onto a container roof in a paddock with no crane. I paid AU$55 per panel ex-GST from a Brisbane liquidator who brings in containers of SanTan stock; they’re pull-offs from commercial decommissions in the US, typically five to eight years old with around 80–90% of nameplate output still on the glass. Delivered to central QLD the freight added another AU$320 for the pallet, so all up the panels cost just under a grand. Wired 6S2P, each string’s open-circuit voltage runs about 6 × 37.8 V = 226.8 V, and maximum power voltage sits close to 6 × 30.3 V = 181.8 V. With two strings in parallel, the array pushes a peak current around 2 × 8.27 A = 16.5 A. That voltage is high enough to keep cable size sensible—4 mm² twin-core solar flex over a 10-metre home run drops less than 2% at full noise—but well within the 250 V DC input limit of the average 60 A MPPT charge controller used on a 48 V battery bank. On a stinking February afternoon, when cell temperatures top 65°C, the voltage drops back a few percent, and the controller still wakes up and tracks hard. I mount the panels on a 15-degree tilt frame made from 40 mm galvanised unistrut, bolted through the container’s corner castings with M12 hot-dip bolts. Spacing panels 20 mm apart lets a bit of westerly wind slip through instead of lifting the lot like a sail. The combiner is a basic IP65 box with two touch-safe 15 A DC breakers, one per string, so I can isolate a string for testing without shutting the whole array.
- 5kWh SOK 48V rack LiFePO4 battery
- Victron Quattro 3,000W inverter/charger (120V, surge to 6,000W)
- The Victron SmartSolar MPPT 250V 85A charge controller is the one I reach for when a container home in western Queensland runs a big series string of house panels. In Australian dollars, this unit sits around the $1,000 mark from most solar wholesalers—sometimes a touch under, sometimes a touch over depending on freight to a remote postcode. You get a blue anodised aluminium box weighing about 3 kg and measuring roughly 30 cm tall, 21 cm wide, and 12 cm deep. The heatsink fins on the back tell you straight away it is a fanless design, which matters once bulldust and corrugated-iron shed heat get into the mix. It takes a PV open-circuit voltage up to 250 volts from the array. That 250-volt headroom lets you run eight or nine big 370-watt panels in series without nudging the limit, even when a winter morning near Roma or Charleville pushes the array voltage up by 10 per cent. Keeping the string voltage high means you can run thinner, cheaper cable from the array to the shed and lose fewer watts on the way. The controller then bucks that voltage down to suit a 12, 24, or 48-volt battery bank—it auto-senses the nominal voltage—and pushes out up to 85 amps of charge current. Into a 48-volt lithium bank you are looking at a bit over 4 kilowatts of real-world charging grunt; into a 24-volt flooded lead-acid set it tops out around 2 kilowatts. Cause and effect: if you wire a 4.8 kW array into a 24-volt system, that 85-amp ceiling will clip the midday peak flat, and you have paid for silicon you cannot use. On the bench, the terminal covers unscrew with a flat-blade driver. The PV and battery terminals take cable up to 35 mm², and you torque them to the numbers stamped into the case. I always bolt a 100-amp DC breaker between the battery side and the busbar, not just for isolation but because it stops you welding the spanner if a fault develops in the unit. Wiring it backwards—PV into the battery lugs—will let the smoke out immediately. Mount the controller vertical on a sheet of painted ply inside a vented steel enclosure. If you mount it flat or box it in with zero airflow, the internal temperature sensor will back the output off hard once the heatsink passes about 40 °C. Inside a container home power shed near Longreach in January, the ambient air is already brushing 45 °C before the sun gets high, so the derating is real. A small 12-volt computer fan wired across the battery side and aimed at the fins can claw back a surprising amount of lost charge, and it costs less than a carton of beer. The unit has built-in Bluetooth, so you stand next to the shed with a phone, fire up VictronConnect, and you can see the array volts, the battery volts, the charge current, and the state of the internal charger logic without cracking the door. The VE.Direct port lets you plug in a cable to a Cerbo or a Raspberry Pi later if you want remote
- The Victron Cerbo GX is the bit that turns a collection of separate charge controllers, inverters, and battery monitors into something you can manage without walking outside in thongs and a head torch. In a typical container-home install, the Cerbo sits inside a small 12-pole enclosure on the plywood backboard, roughly 140 mm wide by 110 mm tall, drawing less than 3 W. It ships with a microSD card preloaded with the Venus OS, so it boots straight into the VRM portal once you give it an internet connection. The local display, usually a GX Touch 50 or 70, plugs into the HDMI and USB ports on the Cerbo and gets mounted on the wall next to the main switchboard. Together they set you back around $580–$650 AUD depending on screen size and who you buy from, which is about the same as a decent secondhand laptop but built to sit in 50-degree heat without the battery swelling. The brain part is literal: every VE.Direct and VE.Can device in the shed connects to the Cerbo by a data cable thinner than a matchstick. A typical 48-volt system will have two or three MPPT charge controllers, a MultiPlus-II inverter/charger, a BMV-712 shunt, and, if you paid attention to the BMS, a lithium battery talking over CAN. The Cerbo pulls the solar yield, load, state of charge, and battery cell voltages into one stream and pushes it to the Victron Remote Management portal over a 4G modem or the station Wi-Fi. The first time a summer storm trips the inverter and you reset it from the pub in town because you got an alarm on your phone, you understand why it earned its spot on the backboard. In Australian practice, the Cerbo must be fed clean 12–24 V from the system battery, via a 1 A blade fuse right at the busbar. The usual mistake is tapping the auxiliary output of a charge controller, which drops out overnight and leaves the Cerbo dead until sunrise. Another local detail: the Cerbo’s USB ports are fine for a wireless keyboard dongle or a firmware update stick, but the USB socket is not sealed. In a shed with red dust and the occasional gecko, a blob of neutral-cure silicone over the unused ports stops a short circuit that can take down comms to the inverter. The onboard relays can be wired to trigger a genset start or an alarm beacon, but almost everyone around Longreach just uses the VRM app alerts and a generator manual-start protocol they stuck on a laminated card inside the main breaker panel.
- IronRidge roof mount system
This runs lights, fans, a fridge, a water pump, security cameras, and a mini-split air conditioner in a 40-foot shipping container. On average, the system produces about 6kWh per day, with most of that going to the air conditioning. The battery typically drops to 30-50% overnight and recharges fully within a few hours of sunlight the next morning.
Planning Your System Size
The Longneckers sized this system specifically for the goat barn container. Their power priorities were: a 40-litre Engel fridge set to 4°C for vaccines and mastitis treatments, a pair of 12-volt LED strip lights above the milking rails, a 250-millimetre 12-volt marine bilge fan to shift hot air out the east wall, and a 300-watt modified sine wave inverter that runs a cordless drill charger or an electric fence tester for ten minutes a week. That fridge is the real load.
Daily Power Consumption For Summer
An Engel MT45 draws about 2.7 amps when the compressor cycles, and in a container that can hit 45 degrees inside during a western Queensland afternoon, it runs roughly 18 hours a day in summer. Factoring in the door seal leak from the dust that settles on the gasket, you can bank on 45 amp-hours a day straight off the battery. The LED strips use 0.6 amps each, and a milking session runs them an hour in the dark, so call it 1.2 amp-hours.
The fan runs eight hours on a thermostat set to 35 degrees, drawing 1.5 amps, adding 12 amp-hours. The inverter idles at 0
- Mini-split air conditioning (heating and cooling)
- Fridge for milk storage
- Water pump
- Lighting and fans throughout
- Security cameras
The milking room drove the entire system design. A 200-litre vat fridge kept milk at 3–4°C, pulling 90 watts when the compressor ran, which in a central Queensland summer cycled on for 16 hours out of 24. The hot wash for the stainless steel buckets and claw pieces came from a 2.4 kW element inside a 50-litre stainless tank, heating water to 80°C twice a day. Six Saanen does sheltered off the side of the shed had a 150-watt infrared heat lamp on a timer for the three coldest winter weeks. Everything else—lights, house circuits, the Ute shed—was secondary.
Sizing The Battery Bank
Those milking loads added up to 2.8 kWh per day before losses, a figure I checked with a plug-in meter over a full week in February, the hottest month when the fridge worked hardest. Working backwards from that number, I sized a 48-volt battery bank at 400 Ah, which gave 19.2 kWh nominal and a daily depth of discharge around 15%. That shallow cycle keeps lead-acid plates from sulphating prematurely, a lesson from a set of AGMs I killed in three years up near Longreach.
Solar Array And Inverter Costs
In a paddock with clean northern exposure, I set six 415-watt Trina panels on a ground mount tilted at 27 degrees, matching the latitude south of Rockhampton. At $180 to $220 per panel wholesale and $1,200 for a decent MPPT charge controller, the array and charger came to just under $2,500. The inverter-charger was a 5 kVA unit, priced around $3,400, because the hot-wash element needs a clean sine wave and a solid surge rating.
Define Load Measure And Add
Total cost for core gear, including racking, breakers, and 35 mm² copper cable runs under 15 metres, landed at $9,800—trade pricing, mid-2022, with the owner digging the footings and running conduit himself to save labour. The cause-and-effect is simple: define the load that cannot fail, measure its real consumption on-site, then add the battery and solar capacity to keep it running through three cloudy days. The goats don’t care about kilowatt-hours, but milk sitting above 5°C for two hours breeds a bacterial count that the dairy inspector will notice before you do.
Get that right, and the system works; everything else is just extra plugs downstream.
Start With Daily Energy Needs
Up here in central Queensland, a container home chewing through 8–12 kilowatt‑hours a day is no surprise once you add a chest freezer, a water pump, and a small split‑system air‑conditioner. That daily figure is where every off‑grid design starts, not with a pile of panels. Our Solar Panel Sizing Calculator runs those numbers against the Bureau of Meteorology’s monthly peak‑sun‑hour data for Rockhampton, Longreach, or wherever your block sits. For a 10 kWh daily load and 5.2 peak‑sun hours in July, you end up with a 2.4 kW array before losses. In practice I round up to 3 kW of panels, which is ten 300‑watt units. They cost about $0.80 to $1.00 per watt ex‑GST in 2024, so $2400–$3000
Why Victron?
After running seven separate Victron installations on their homestead — from large house-sized systems down to small 12V pump houses — the Longneckers are all-in on the brand. Here is what Victron brings to the table that most competitors do not:
- Any inverter or charge controller destined for a shed west of Rockhampton lives or dies by its firmware. I’ve pulled units out of boxes that couldn’t hold a float voltage steady past 40°C because the factory code never accounted for a tin roof radiating 65°C into the power room. The gear I specify now—typically a 5 kVA Selectronic SP PRO or a Victron MultiPlus-II 48/5000—ships with firmware that has been through enough Australian summer cycles to know the difference between a cloud edge and a dying string fuse. That matters when the nearest replacement fuse is a two-hour round trip in a ute chewing $2.10 diesel. A rock-solid firmware set also means the generator auto-start relay closes on the first low-voltage trigger, every time, not just when the planets align. I’ve logged units that have cranked a Honda EU70is without a miss for four wet seasons straight. Price tag for an inverter-charger with this level of firmware discipline runs $4,200–$5,800 AUD depending on kVA, and you can bank on a service life of ten years minimum if you keep the dust out. Updates come as a download onto an SD card or USB stick, no laptop needed in the field. I slot the card into the front panel, the screen confirms the checksum, and the whole job takes three minutes while the kettle boils. That regular cadence of updates—maybe twice a year—patches things you’d never spot yourself, like a drift in the voltage sense circuit that, left alone, would push 0.3 V extra into a lithium bank daily. Over a year, that 0.3 V ages $3,800 worth of LiFePO4 cells far quicker than the datasheet curve suggests. So the firmware isn’t a bonus feature; it’s the difference between a bank that holds capacity at year eight and one that stumbles at year five, right when the wet season means four days of cloud and you’re stretching every amp-hour.
- I specify the Victron Cerbo GX because VRM Portal is Victron’s free cloud platform and the Cerbo is the least-painful way to get a system online without nursing a Raspberry Pi through bulldust and 45‑degree shed days. A Cerbo GX runs about $385 AUD from a Queensland distributor, plus $15 for a 5‑metre UTP cable to reach the inverter stack if the shed is long. If you are truly broke and patient, a Raspberry Pi 3B+ with a genuine 16 GB SD card and the free Venus OS image will land around $110 AUD and works fine until you unplug it the wrong way and corrupt the card. In a central Queensland paddock, “anywhere in the world” means you first make the internet solid. I fit a Teltonika RUT240 4G router on the shed wall – $195 AUD at the time of writing – and a $2 wholesale SIM on a plan that throttles after 1 GB. VRM traffic is about 20 MB a day if you load the portal twice. The router sits on its own DIN rail next to the battery monitor, fed from the same 12‑volt fused aux circuit so it boots when the system boots. A stubby LTE antenna on the breaker gives two bars. I once spent three days chasing a phantom low-voltage alarm that turned out to be a faulty crimp; I could see the cell sag on the VRM graph from a motel in Rockhampton, so I knew the battery wasn’t dying, only the connection was. The Cerbo talks to a MultiPlus-II over a standard blue RJ‑45 VE.Bus cable, and to a SmartSolar MPPT via a VE.Direct cable that comes in the inverter box. No programming beyond plugging it in and entering the portal’s MAC‑style ID into the phone app. I tick “auto‑update” on the Cerbo and leave it. After that, you can see live wattage, state of charge, and daily yield from anywhere with a web browser. You can also flick the MultiPlus from “On” to “Inverter Only” to stop the generator from auto‑starting during a late‑night test, which stops the neighbour’s kelpie from trying to burrow under the fence. The cause-and-effect is immediate: if the tank water pump sticks on, the battery draw jumps 800 W and I get a push notification before the pressure tank boils dry. The hardware cost to make that happen is about $600 AUD total, including the Cerbo, router, cables, and a decent micro‑SD card if you go the Pi road. That is cheap insurance when your battery bank holds $4,000 of cells that don’t like being drained to 0%.
- CAN-bus communication between components, so the inverter, charge controller, and battery all share data automatically
- Modularity — replace one component without touching the rest
- You can grab a Victron Quattro 48/5000/70-100/100 for around $3,800 AUD, and that single box becomes the nerve centre for bringing a generator into a container home system. The model number spells out what it handles: 5000 VA continuous at 25°C, a 70 A battery charger, and two 100 A transfer switches. That transfer switch matters – the Quattro has two AC inputs, something the MultiPlus range lacks. I wire the generator into AC-in 1 and leave AC-in 2 for a future grid connection or a second generator. When the generator starts, the Quattro synchronises with its output frequency and voltage, then feeds the loads directly while diverting any leftover capacity into charging the battery bank at up to 70 A. At that rate a 48 V bank pulls roughly 3.4 kW, which sits comfortably behind a common 6 or 7 kVA diesel generator like a Kubota J108 or a single-phase Yanmar L70 clone. On a 30-litre tank those little diesels will chug along for 10 to 12 hours at part load, burning around 1.5 to 2.5 litres per hour. That is not cheap running – farm diesel in central QLD rarely dips below $1.80/litre – so the goal is always to slam bulk charge in as few hours as possible. The Quattro’s generator acceptance window is another reason it earns its keep. I can set the incoming frequency tolerance down to 45 Hz and voltage as low as 180 V without the inverter rejecting the supply, which saves a lot of swearing when a bush generator’s governor sags under load. In the paddle shed I configure the charger current limit to match the generator’s continuous rating, not its surge rating. If a 6 kVA generator has a continuous rating of 4.8 kW at 40°C, I set the AC input current limit to around 20 A at 240 V, leaving a bit of headroom for the container’s lights and pressure pump. A 16 mm² heavy-duty extension lead with a 32 A round pin plug and inlet on the container wall is the standard connection; screw terminals inside the Quattro take the incoming active and neutral straight to the AC-in terminal block. The generator bonding must be sorted properly – the generator’s frame earth connects to the container earth stake via a 6 mm² green-and-yellow, and the inverter handles the neutral-to-earth bond through its internal transfer relay when shore power is active. That setup meets AS/NZS 3000 and keeps the MEN link in one place so an RCD operates. On a typical 15 kWh Pylontech US3000C stack, the Quattro charger will push a full charge from 20% state of charge in just over three hours once the generator is up to temperature. I set the absorption voltage at 52.4 V and float at 51.8 V to keep the lithium cells happy, and the low-voltage generator start trigger at 47.5 V so the bank never drops below 10% capacity. The Quattro’s programmable relay can fire the generator’s two-wire start circuit without any extra interface box, so a pair of 1.5 mm² control wires run from the inverter’s relay output to the generator’s auto-start terminals. The generator sits under a lean-to 20 metres from the container, with the exhaust pointing away from the prevailing southeasterly, because replacing an air filter clogged with red bulldust every six months is already bad enough without adding diesel soot to the mix.
No sponsor ever cut us a cheque. Victron gear sits in the shed because we paid full retail for every blue box, and we have no dealer agreement, no freebies, no backlink arrangement. That’s worth saying up front. We landed on Victron after burning through three cheaper inverter-chargers out here west of Rockhampton, where the paddock shade hits 45°C before lunch and the fine bulldust gets into everything. The first no-name 48-volt unit cooked its transformer in fourteen months; the second had a charge profile that boiled our flooded lead-acid bank dry two summers in a row.
Choosing Reliable Off-Grid Equipment
When you’re hauling 20-litre jerry cans of deionised water in 40-degree heat just to keep the batteries alive, you start caring about float voltages that actually hold where you set them. We started reading the fine print, bench-testing loaner units, and tracking down sparkies who ran off-grid cattle stations north of Clermont. The same name kept coming up. Our core wall of equipment is all Victron: a MultiPlus-II 48/5000/70-50 inverter-charger, a SmartSolar MPPT 250/100 charge controller, a BMV-712 battery monitor, and a Color Control GX.
Off-Grid Power System Costs
At 2021 prices, that lot cost $4,340 AUD landed from a Brisbane wholesaler—freight to the property added another $190 because we’re outside the standard courier zone. The MultiPlus-II runs a 5 kVA continuous output at 48 volts, weighs 26 kg, and sits on a steel bracket we welded to a container wall stud. The toroidal transformer hums at about 52 decibels under full load, which you notice in a 20-foot container when the fridge cycles at 2 a.m.
Research Pays Off With MPPT
That hum is a trade-off we accept because the unit can start a 1.5 kW deep-bore pump on a long line without tripping, something the previous inverter never managed. Cause and effect is where the research paid off. The 250-volt open-circuit limit on the MPPT let us run three strings of secondhand 250-watt poly panels—wired in series for 187 volts peak—without blowing the controller’s input rating on a clear June morning when the first sun hits cold panels and voltage spikes. Standard practice says you derate for winter mornings, and that one number saved us a $600 mistake.
Upgrading Firmware And Parallel Stacking
The kit talks to each other over VE.Direct and VE.Bus cabling, and pushing firmware updates from a USB stick in the dirt while squatting next to the container door is part of the annual April routine. We’ve since added a second MultiPlus in parallel, stacking for 10 kVA, which required a $180 RJ45-splitter dongle and half a Saturday crimping heavy-gauge DC cables.
Grounding The Cracking Clay
Everything is grounded to a ring of four two-metre earth stakes hammered into the cracking clay at the container corners; dry-season soil resistance measured 18 ohms, so we poured a barrow of gypsum around each stake to pull that down to 7 ohms. That detail never makes the brochure, but it stops the RCD nuisance-tripping that some blokes blame on the inverter. So no, nobody from the Netherlands sends us Christmas cards. We just know what a fried IGBT board smells like, and we haven’t had to replace a single Victron component since 2019.
Solar Panel Mounting with IronRidge
The existing shade awning on the container’s south side was 40 feet by 10 feet of corrugated steel, pitched at 5 degrees, bolted to the container with six heavy-gauge steel brackets. Instead of building another ground frame, we treated that roof as the mounting surface. The IronRidge online design tool had already delivered for the main homestead’s 8 kW ground mount, so I logged in again and set this one up as a flush roof mount.
Automated Structural Engineering Calculations
I punched in 40 ft by 10 ft, 5-degree pitch, metal roof type, and the local wind speed data for the site—110 mph basic wind speed, Exposure C, because the container sat in open desert with no windbreaks. The calculator crunched the numbers and spat out a full bill of materials, rail spans, fastener schedules, and stamped engineering letters for the local building department. That replaced guesswork with a paper trail.
Container Roof Racking And Panels
The IronRidge racking for the container roof came to AUD $1,470 delivered, including 8 XR100 rails, mid- and end-clamps for 12 panels, L-feet, Tek screws with sealing washers, and three rows of bridging. I picked up 12 second-hand 250W polycrystalline panels from a grid-tie decommissioning in Brisbane at $120 each—$1,440 total, tested under load and all putting out within 5% of nameplate. Wiring was 4 mm² twin-core DC cable inside UV-rated conduit, clipped along the container ribs; a single string of 12 panels into a Morningstar TriStar 45 MPPT controller I already had on the shelf.
That string voltage sat at 360V open-circuit on a 25°C morning, dropping to about 340V under load, which kept the MPPT in
Design Tools For Australian Roofs
IronRidge products are available locally and the online design tool works for Australian roof types and wind regions. The tool let me set the site in wind region C – standard for much of cyclone-prone central Queensland – and it spat out rail spans, cantilever limits and fastener schedules for the specific profile of a container’s corrugated roof. I used that output directly, no guesswork. The key mounting components were XR100 rail, UFO clamps, L-feet with bonding washers and M8 self-drilling screws.
Rail Splicing With IronRidge Joiners
For a 12-metre container roof holding eight 370 W panels in landscape, the plan called for four rails running the length of the roof, each rail 6.1 metres long. I bought the rail in 5.8-metre lengths from a Brisbane distributor and spliced them with the IronRidge joiner splices – a couple of Tek screws per join, nothing exotic.
Mounting Hardware Costs And Strength
A 5.8-metre length of XR100 mill-finish rail cost me $109 plus GST in mid-2023; by the time you add the UFO clamps at about $8 each and the L-feet at around $12 apiece, the total mounting hardware for a 3.2 kW array sat just under $950. That’s not pocket change, but it’s what you pay for a system that won’t flex in a 200 km/h gust. Every L-foot was screwed into the container’s raised roof rib, not the flat pan, so water couldn’t pool around the penetration.
- S5 Solar Feet are machined aluminium mounting feet that bolt through the R-panel metal roof into the rafters. In a central Queensland shed, the R‑panel profile is almost always a Bluescope Lysaght Trimdek or Klip-Lok 406, rib height 29 mm, sheets typically 0.42 mm base metal thickness. The S5 foot clamps onto the rib with a pair of stainless grub screws; you then drive a 14g Tek screw with an EPDM sealing washer straight through the foot’s baseplate and the roof sheet into the top chord of the rafter. Each foot adds a single point‑load penetration, so the seal matters more than the bolt torque. You can feel the difference immediately when a washer bottoms out cleanly on the zincalume coating rather than chewing into a lap joint. Budget on $7 to $9 per foot in boxes of 20 from a specialist solar wholesaler, trade account, mid‑2024. That includes the cast‑and‑machined 6005‑T5 aluminium body, two M8 stainless cup‑point grub screws, and a 14‑10 × 65 mm hex‑head Tek screw with the bonded washer. Without a cordless impact driver set to a gentle ramp‑up, it is easy to overtighten and strip the aluminium thread on the grub screws, which then spin uselessly instead of biting the rib. The cause‑and‑effect is immediate: a stripped foot has to be replaced because the clamp load is gone, and a loose panel on a cyclone‑rated roof becomes a two‑metre sail in the next summer storm. Standard roof rafter spacing across QLD sheds is 900 mm or 1200 mm; with S5 feet you place one foot per rib at every rafter crossing, so three to four feet per sheet per rafter line, depending on sheet width. Drilling into a rafter you cannot see from above means using the screw pattern already visible in the existing roof fasteners, and never guessing the batten line. Marking a chalkline along the fastener heads before you lay out the array saves the sickening crunch of a Tek screw spinning in thin air. In practice, the feet call for a 6.5 mm pre‑drill through the rib if the roof sheet is unpainted zincalume, to stop the grub screw galling, though plenty of roofers skip it and then swear at the third foot. The finished stack—foot, seal, screw—gives about 15 mm of air gap under the rail, which is enough to let heat and rainwater run free while keeping the module frame clear of standing water. The whole job is straightforward until you find the rafters were set out at 910 mm centres by a contractor who “rounded up” from 900 mm, and your neatly spaced S5 feet suddenly don’t line up with the rail slotting. Pack a handful of slotted L‑feet for those edge bays and move on.
- XR Rails are the horizontal mounting rails that the panels sit on. Around central Queensland every wholesaler I deal with stocks the Clenergy XR rail in 4.2‑metre lengths, and at the time of writing a stick runs $48–$55 plus GST if you pick it up from the counter at Rocky or Mackay. That puts the per‑metre cost between $11.40 and $13.10, which adds up fast on a 6.6 kW tin‑roof array with eighteen panels in portrait—twelve rails at 4.2 m each, so you are staring at a rail bill of roughly $600–$700 before you buy a single clamp. The profile is 35 mm high, 49 mm wide, with a 10.5 mm T‑slot running the full length of the top face. That slot swallows a stainless T‑bolt and locks it from spinning while you tighten a mid‑clamp down onto a panel frame, so you can set the whole row from one side of the rail without the bolt chasing you back into the channel. On a corrugated iron shed roof the rails
- UFO (Universal Fit Object) clamps bite onto the rib of a corrugated roof without a single hole. In central Queensland, any penetration through a container roof is just a future rust stain and a call-out you do not want on a 40-degree December afternoon. These clamps come in two halves. The bottom jaw hooks under the roof sheet’s raised seam. The top half captures the panel frame, usually a 35 or 40 mm aluminium extrusion. A single M8 stainless bolt pulls them together and torques to around 15–18 Nm. That is enough to meet the wind-uplift requirements for Region C cyclonic zones when spaced per the racking manufacturer’s table—commonly four clamps per landscape-oriented 60-cell panel, with the outer clamps 200–300 mm from the panel ends. Cost on the ground runs about $6 to $9 per clamp from a solar wholesaler in Townsville or Rockhampton. A pallet of 30 panels ends up needing 60 mid clamps and 30 end clamps, so somewhere around $700–$900 in hardware before you add the rail. That price hurts for a minute, but it buys you a roof that still keeps the rain out of a donga full of inverters and lithium batteries. The alternative is roof brackets with butyl tape and tech screws, and once you have fixed a dozen leaks around screw heads that worked loose on the Bruce Highway corrugations, you stop minding the clamp cost. The standard container roof uses trapezoidal ribs 25–30 mm high, and UFO clamps are made to suit exactly that profile. You seat the clamp by hand until you feel the jaw click over the rib, then nip it up. If you overtighten, you crush the rib and lose clamping force. I use a small torque wrench and check every fifth bolt. A dab of anti-seize on the stainless threads stops galling after a few wet seasons. Panels sit flush and the air gap underneath stays around 40–50 mm, enough for airflow to keep cell temperatures down on a 38-degree day. Heat is the enemy of voltage, and a panel running 20 degrees cooler because of that gap gives you an extra half a volt per panel, which adds up across a string of ten. I have used the same UFO clamps on sheds, container tops, and even a chook-pen roof at a cattle station north of Cloncurry. The oldest set has been through six wet seasons and still holds firm. Once they are on, you can walk the ridge line to clean panels without worrying about loosening a seal. That is the difference between a system you install and a system you keep fixing.
- On the end of every rail run you’ll fit a stopper sleeve or an EFO end clamp. Stopper sleeves are plastic press‑in caps that cost about 60 cents apiece from a country electrical wholesaler and take five seconds to knock in with the palm of your hand. Their real job isn’t cosmetic; they keep the rail mouth closed to mud wasps and geckos that otherwise pack the hollow with mud and eggs. A mud-blocked rail traps moisture and speeds up electrolytic corrosion between the aluminium rail and the zinc-plated T‑bolt, so a missing stopper turns a 20‑year extrusion into a pitted mess inside three wet seasons. The sleeve also turns a guillotined rail end from a razor edge that’ll open a forearm into something you can brush past without a band‑aid. EFO end clamps are cast aluminium clamps that bolt into the top channel of the rail with a stainless T‑bolt and flange nut. They bear on the outer lip of the last panel’s frame and pull it down onto the rail with the same 15–18 Nm of torque you use on mid clamps. A pack of 10 end clamps with stainless hardware runs $18–$22 from a solar racking supplier in Brisbane, roughly $1.80 each. When you set the first panel on a ground‑mount array in black soil country, you set one end clamp loose, draw the panel hard against it, then work your way along the row. That clamp acts as a hard stop so the panel can’t walk sideways under thermal cycling—40°C days followed by 15°C nights in winter make aluminium grow and shrink enough that a panel will shuffle if you rely on friction alone. The last panel in the run gets its own end clamp, and together they create a clean visual finish that’s also functional: no exposed rail lip to catch a trouser leg or funnel rainwater into the vehicle‑charging gearbox under the array.
A few critical notes from their experience: get your panel spacing and alignment right before clamping anything down, and always torque UFO clamps to spec. Overtighten and you can crack a panel. Undertighten and a panel can work loose in a wind storm. They also recommend investing in both a foot-pound and inch-pound torque wrench, and a deep socket set.
Solar Wiring: Series vs Parallel
In a shed on the blacksoil plains out past Dalby, a 6S2P setup does the heavy lifting without fuss. Each 250W panel—bog-standard 1.6‑metre by 1‑metre polycrystalline, about $190 to $260 each at a rural electrical wholesaler—puts out about 37V and 8A when the midday sun hits it clean. Six of them wired in series adds the voltages while keeping the current steady, so the string runs at approximately 230V and 8A. That higher voltage lets you push power 30 metres through ordinary 4 mm² DC cable without turning your copper into a bar radiator.
Series Strings And MPPT Limits
Parallel two of those strings at a fused combiner box bolted inside the container and the current doubles to 16A while the voltage stays at 230V, giving 3,000W total. An MPPT charge controller with a 250‑volt input ceiling will swallow that happily, even on a crisp July morning when the open‑circuit voltage climbs, because a 6‑series string of 37‑volt panels sits comfortably under the limit. The parallel connection means if one string cops shade from a gum tree at 3 pm, the other keeps feeding current without dragging the array voltage down hard.
High Voltage Series-Parallel Benefits
Why series-parallel? Running panels at high voltage (230V from six in series) means the system performs better in low-light and cloudy conditions — the MPPT controller can still find usable voltage even when irradiance is reduced. It also means thinner, cheaper cable runs from the array to the charge controller.
I mount a galvanised-steel combiner box on the container’s northern wall, right where the two panel strings come off the roof rack. Each string enters through a dedicated IP65 cable gland and lands on a touch-safe fuse holder — 15 A fuses for the strings I run here in central Queensland, with a two-pole DC isolator and a spikey little 600 V surge arrestor tucked in alongside. The box cost me $140 at the local electrical wholesaler.
Brass Terminals And Underslung Gland
It’s nothing fancy, but all the terminals are brass, the door gasket hasn’t turned to dust in three wet seasons, and the knockouts actually line up. From the load side of the fuses, a single 8AWG solar cable leaves the box through an underslung gland and punches through the container wall into the shed cavity. I keep that run under two metres so the voltage drop is in the noise. That 8AWG is double-insulated, tinned-copper, cross-linked-polyethylene cable stamped to AS/NZS 5033. It runs about four dollars a metre.
Use Genuine MC4 Connectors
One end lands on the PV input of the Victron SmartSolar MPPT charge controller I have bolted near the battery rack; the other end stays torqued to 4 Nm inside the combiner box. MC4 connectors are not a place to save ten bucks. I use genuine Staubli MC4s, crimped with the matching die set. A cheap multi-purpose crimper leaves the contact barrel oval or half-crushed — then you get a hot-spot, the plastic housing goes milky, and the connector melts about the time the midday sun is pushing 30 amps through the string.
Silent Failure Of PVC Cables
That failure is silent until the arc-fault trips the gear or you smell burning PVC on the breeze. The cable itself is every bit as important. Standard building wire has PVC insulation that hardens, cracks, and channels moisture after two dry seasons of ultraviolet and 65°C roof heat. Once water wicks into the conductor and starts electrolysis, you’ll spend an afternoon with a multimeter chasing an earth fault that only appears when the panels are loaded. No double-insulated solar cable, no go.
The Victron SmartSolar MPPT Charge Controller
The Victron SmartSolar MPPT 250/85 sits on the wall of the container like a solid brick of blue aluminium, roughly 400 mm tall by 250 wide and 140 deep, weighing close to 6 kg. In Australia you will hand over between $900 and $1200 for one, depending on how hard your local supplier got stung on freight. The “250V” on the label is the maximum open-circuit voltage it can handle from the panels, so on a frosty Central Queensland morning when panel voltage spikes, you keep the string Voc below that figure or you let the smoke out.
MPPT Algorithm Powers The Shed
The “85A” is the maximum battery current it can push: 85 amps into a 48-volt LiFePO4 bank gives a real-world charge power around 4.4 kW, enough to feed a decent shed array. Inside, the MPPT algorithm is doing the heavy lifting. It takes the high-voltage DC from the panels—typically 120–200 V from a string of six or seven 400 W panels—and chops it down to the correct charging voltage for a 48 V LiFePO4 battery, usually sitting at 56.0 V absorb and 54.0 V float once the battery management system stops calling for bulk current.
MPPT Controllers Prevent Voltage Damage
Without that step-down, the 200 V from the roof would destroy the cells inside a week. The controller tracks the array’s maximum power point every few seconds, so when a cloud passes over the bore pump and the sun comes back, it finds the sweet spot again and keeps the charge current steady. In practice, this means an array that would dribble 30 A through an old PWM regulator will reliably deliver the full 85 A through the SmartSolar as soon as the light is good.
Mount For Optimal Heat Dissipation
Mounting it is straightforward: four Tek screws into a steel stud, a bit of space top and bottom so it can breathe, and a pair of 35 mm² battery cables running no more than a metre to the busbar to keep voltage drop below 0.3 V. The unit’s internal temperature sensor backs off the current if the heatsink gets past 60°C, so in a container that hits 45°C ambient in January, you mount it out of direct sun or add a small computer fan to the fins.
Once commissioned with the VE.Direct Bluetooth dongle—another sixty bucks—you can sit on the verandah and see exactly how many watts are coming in and how many amp-hours the battery has swallowed since sunrise. No mystery, just a blue box that earns its keep.
Key wiring points:
- The positive and negative PV cables land on a 20A double‑pole DC circuit breaker inside a grey IP65 enclosure beside the charge controller. This breaker is your manual solar disconnect and overcurrent protection in one. Twenty‑odd dollars from any electrical wholesaler out here gets you a unit with a magnetic blowout chute that snuffs a DC arc instead of feeding it. I torque the cage clamps to 2.5 Newton‑metres—just enough grip to hold fine‑stranded copper without a single whisker escaping. An AC breaker in the same spot will weld itself into a glowing lump by lunchtime; I have scraped enough melted bakelite out of combiner boxes to stop trying to save ten bucks. Australian Standards require both poles broken for a floating array, so positive goes through one pole, negative through the other. A quick flick kills the whole string even under a midday summer sun with the panels pumping their full short‑circuit current. Label the lid “Solar Array Isolator” with a paint pen, and the next poor bastard doing shed maintenance won’t fry himself tracing cables.
- A DC MidNite Solar Lightning SPD is wired directly onto the PV positive and negative lines inside the combiner box, just before the conductors enter the charge controller. In central Queensland, a single afternoon storm can dump enough induced energy into a ground-mount array to turn a $900 MPPT unit into a smoking enclosure—I’ve replaced three for neighbours who skipped this hundred-and-forty-dollar part. The MidNite unit clamps in under 25 nanoseconds, shunting the surge to earth through a dedicated 6 mm² copper lead no longer than 300 millimetres, straight down to the main earth stake. Any bend in that lead adds impedance and defeats the purpose. Buying one from an Australian electrical wholesaler typically costs $130–$160, and AS/NZS 5033 essentially mandates protection like this when your DC cable run exceeds 10 metres in high-lightning-risk areas. Installation means stripping back the PV cables, landing them in the parallel screw terminals on the SPD, and torquing to 2.5 N·m—no piggyback spade connectors, no tape. The red and green indicator window shows a healthy varistor; if it reads black, the module has sacrificed itself and you swap it out in five minutes with a flathead screwdriver.
- In a typical central Queensland shed install, the MPPT solar controller sits on a plywood backboard near the battery, and the Cerbo GX communications unit lives on a shelf above the inverter, plugged into a 12-volt outlet for power. The link between them is a VE.Direct cable—Victron’s own name for a small four-pin data lead with a locking tab. A VE.Direct cable connects the MPPT to the Cerbo GX for monitoring and data logging. That tab snaps into the socket on the MPPT’s VE.Direct port and can get brittle after a few years of 40-degree heat, so I zip-tie the cable body to the MPPT case to stop it backing out from vibration or the occasional boot nudge. The standard 1.8-metre cable costs around $25–$30 from an Australian solar wholesaler, while the 5-metre version runs closer to $45–$50. I’ve seen blokes try to save a dollar with generic TTL-to-USB adapters, but the baud rate and pinout aren’t always right, and a noisy signal on a hot corrugated-iron wall gives you packet drops you’ll chase for weeks. The genuine article carries the MPPT’s real-time data—panel voltage, charge current, yield in watt-hours, battery temperature if you’ve got the sensor—straight into the Cerbo GX. Without that hard-wired link the Cerbo can only see the inverter and battery via the battery monitor, leaving the solar side dark. Once the cable is plugged in, the Cerbo picks up the MPPT automatically on its device list. That data then flows to the VRM portal over whatever internet dongle you’ve plugged into the Cerbo’s USB, giving you a log of how many kilowatt-hours the array made each day, how long it spent in absorption, and whether a string fuse blew in the middle of a storm. For an off-grid house 50 kilometres from the nearest mobile tower, that morning check on yesterday’s yield beats walking to the shed in the mud to squint at the MPPT’s tiny screen.
- Battery positive leaves the terminal lug and first meets a 100A single-pole toggle switch—the red-key type you find on the shelf at any auto sparky in central Queensland, typically a Hella or Narva master isolator rated for 100 amps continuous at 48 volts DC. I pay $35 to $45 for one that won’t melt its internals; the cheaper copies at $25 from a pop-up market stall drop voltage and
In a central Queensland container home, the T-Class fuse between the battery and everything else is your last line of defence against a battery short-circuit event. You mount it as close to the battery terminals as you can swing a stubby ring spanner — in my own 12-volt-then-48-volt rewiring days I bolted the fuse holder 110 mm of 70 mm² cable away from the positive post. That length isn’t plucked from a catalogue; it’s what fits while keeping unprotected copper to an absolute minimum. I use a 300 A JLLN-type fuse inside a purpose-made holder rated to 125 V DC and 200 kA interrupt, because a
The Victron Quattro Inverter
The Victron Quattro 48/3000/35-50 (single-phase 120V) is where DC battery power becomes AC household power. It is the 3,000-watt model, sitting at the smaller end of Victron’s range, but it still surges to 6,000W for motor-start loads like the mini-split compressor. In a central Queensland container home, that compressor is often a 2.5 kW reverse-cycle split-system; the Quattro’s 6,000-watt surge holds steady for the half-second it takes to get the rotor spinning, preventing an undervoltage shutdown that would leave the shed cooking.
Install The Toroidal Transformer
The unit itself is a 34-kilogram box that commonly retails for $2,200–$2,600 AUD from Australian solar wholesalers, depending on freight to the paddock. Inside, a toroidal transformer the size of a dinner plate does the heavy lifting, humming quietly while it converts a 48-volt battery bank into clean 120-volt AC. You bolt it to a sheet of 17 mm ply on the container wall, keep the top and bottom vents clear, and it will run a full day’s loads without complaint—so long as the battery cables are 70 mm² copper and the crimps are tight.
Quattro Inverter And Charger Specs
The Quattro is two devices in one: a 230-volt inverter and a multi-stage battery charger. A common setup out here in central Queensland uses the 48/5000/70-100/100 model, which delivers 5 kVA continuous and charges a 48-volt bank at up to 70 amps. That unit will set you back somewhere between $3,200 and $4,000 Australian from any of the major solar wholesalers. The AC In-1 terminals on the Quattro exist specifically to take feed from a backup generator.
Using A Generator During Cloudy Weather
During a long stretch of overcast weather — say a week of thick January cloud when your solar array barely covers the fridge — you wheel out the petrol or diesel genny, plug its 15-amp caravan-style socket into the Quattro’s AC input, and start it. The charger input ramps up gently, drawing only the current you’ve pre-set in the VEConfigure software (typically 10 to 13 amps for a small 5-kVA generator) to charge the battery and run loads.
This automatic current limiting means the Quattro never asks for more than the generator’s circuit breaker can deliver, so you avoid the classic paddock frustration of a big inverter-charger tripping the genny’s overload protection and leaving the shed silent.
Select Cable Size By Load
AC output wiring starts at the inverter’s AC Out‑1 terminal. From there you run a two‑core plus earth cable to the main breaker panel. Whether you pull 8AWG or 6AWG comes down to the full‑load current and the cable length, not a guess. In a typical 5 kVA system, 8AWG (roughly 8.4 mm², though most sparkies substitute 10 mm² building wire) handles a 32 A breaker comfortably up to about six metres before voltage drop nudges past the 3% mark the Wiring Rules want.
Sizing Cables For AC Loads
Go to ten metres with the same load and the maths pushes you into 6AWG (about 13.3 mm², often substituted with 16 mm²) because a couple of volts lost at 230 V means your washing machine runs hotter and the inverter works harder to hold the voltage up. I keep a roll of 6 mm² orange circular on the ute for generator feeds, but for permanent AC submains inside a container I’ll use 10 mm² or 16 mm² building cable. That stuff runs $3–$6 a metre at the trade desk depending on copper prices in any given month.
Install Weatherproof Generator Inlet
If you’re putting in a generator input, you run a separate cable of the same gauge—8AWG or 6AWG—from the inverter’s generator terminals to an inlet box on the outside of the container. A weather‑proof 15 A round‑pin inlet, something like a Clipsal 56 Series surface socket, costs $25–$40 at any electrical wholesaler in town. Mount it at chest height on the shady side of the container so the lid doesn’t act as a rain funnel. Terminate the earth cleanly on the dedicated earth bar inside the inverter, not on a screw that also holds a mount bracket.
Protect The MEN Link And Cable
That keeps the MEN link in one place and stops a generator‑side fault from tickling the container skin with a potential you didn’t plan for. Outside the container, run the generator cable through flexible conduit wherever it’s exposed to sunlight; UV chews standard PVC sheath inside a couple of Western Queensland summers.
A MidNite Solar AC SPD on the AC side protects against surges on the AC circuits. The Quattro also has an internal ground-neutral bond for the AC output — you can disable this in software if you prefer to handle bonding in your own distribution panel.
SOK 5kWh 48V Rack Battery
The battery decision for the container home isn’t about chemistry—it’s about the point where labour and small-quantity part costs swamp the savings of rolling your own. The Longneckers know both sides of that equation. Their main homestead runs a 28kWh bank of prismatic LiFePO4 cells they assembled themselves on the workshop bench, managed by a REC BMS. At that scale, buying 32 cells by the pallet, landing them in Brisbane, and adding the REC unit, custom bus bars, compression plates and a steel enclosure saved them roughly 40 percent against a pre-built rack of the same capacity.
Building A 5kWh 48V Battery Bank
The arithmetic flips when you drop to 5kWh. A single 48-volt string needs four 280 Ah cells—good Chinese grade A cells landed at a regional QLD freight depot run $600–800 in total. Then you add the same REC BMS at $450–600, tinned-copper bus bars, a DC breaker, a temperature sensor, and a plywood box. Factor a full Saturday of top-balancing, torqueing terminals with a calibrated wrench, and load-testing the finished bank under the carport. All-in, the parts bill lands between $1,400 and $1,600.
Off The Shelf Battery Banks
A factory-sealed 5kWh lithium battery with a five-year Australian warranty and built-in BMS sits on the shelf at a Townsville wholesaler for $1,800–2,200. So for the small bank, the Longneckers left the hydraulic crimper on the hook. They unboxed an off-the-shelf unit, spannered two lugs, and had the system floating before lunch.
The SOK 5kWh 48V rack battery is a self-contained 3U steel box — 442 millimetres wide, 480 deep, 133 high — that slots straight into a standard 19-inch rack cabinet. I mounted two of them in a ventilated cabinet I knocked together from 40×40 angle iron and 15-mill
Compact Design And Easy Installation
Key advantages of rack batteries for smaller systems come down to sweat, floor space, and fault-finding at 2 a.m. in a shed. A single 48-volt 100 Ah rack module – the Pylontech US2000C is one you’ll see in dozens of Queensland off-grid sheds – sits about 440 mm wide, 410 mm deep, and only 89 mm tall. It weighs 22 kg, which means one person can slide it into a cabinet without a hoist or a mate.
Lithium Storage For Remote Living
Four of those give you 9.6 kWh of usable storage, enough to run an efficient fridge, LED lights, a phone charger, and a small 12-volt pump for a week of cloud without the voltage sag that kills lead-acid. Price in Australian dollars lands between $900 and $1200 per module depending on the wholesaler and whether you pick them up or pay freight to somewhere like Longreach. A floor-standing cabinet that holds four modules adds another $300 to $500, so a 9.6 kWh bank runs about $4000 to $5300 all up.
Lead Acid Versus Lithium Comparison
That’s comparable to a good 48-volt flooded lead-acid bank of similar usable capacity once you factor in the hydrogen venting gear, the battery box, and the fact you’ll kill the lead-acid in six years if you cycle it deep every day. Every rack module ships with its own BMS inside the steel case. It talks CAN bus or RS485 to inverters like the Victron MultiPlus-II or the Selectronic SP PRO, so the inverter knows exactly when to stop pulling current and when to taper the charge. No guesswork, no programming external shunts and midpoints.
Internal Protection Stops Module Damage
The 50 Ah cell blocks are laser-welded inside, and the BMS will disconnect the module if one cell hits over-voltage, under-voltage, or over-temperature – a scenario I saw twice during January heatwaves out past Barcaldine where an uninsulated shed peaked at 49°C. That internal protection stops you destroying a $100
- Simplicity here means the battery management system lives inside the sealed battery case, not in a separate box on the wall. A typical lithium iron phosphate brick sold in Australia—something like a Pylontech US3000C, 48 volt, 3.55 kilowatt-hours—lands on a pallet with the BMS already wired to the cells. No external contactors, no cell-voltage sense harnesses to build. In a central Queensland container home where dust and geckos get into everything, that sealed unit saves a half-day of fiddly control wiring and knocks roughly $400 to $500 off the hardware total because you are not buying a stand-alone BMS controller or a BMV-712 battery monitor. The plug-and-play part is literal inside the Victron ecosystem. You set the four DIP switches on the front of the battery to address 1, run a standard RJ45 CAN-bus cable from the battery’s CAN port to the Victron Cerbo GX or direct to a MultiPlus-II GX, and power up. The inverter or GX device sees the battery data natively—state of charge, charge current limit, alarm flags—without a single manual voltage threshold being entered. Because the BMS talks the Victron-approved CAN protocol, the system won’t accept a charge current that exceeds the battery’s comfort zone on a cold morning, and it won’t try to pull 100 amps from a battery that is already at 95 percent. That single cable eliminates the drifts and calibration fights
- Serviceability is where the rack format really shows its hand in a shed out here. Each 48‑volt module clips onto a set of vertical busbars like a tool battery sliding into a charger, no hard‑wiring needed. When one rack fails—maybe its BMS has gone offline because a single cell sagged below 2.8 volts or the internal temperature hit 55°C on a stinking January afternoon—you pull it out and replace it. The rest of the stack doesn’t blink. Your voltage stays the same, only capacity reduces: a 48‑volt nominal bus that was 400 ampere‑hours at 50 volts might drop to
- CAN-bus native integration — Victron's system automatically detects the battery parameters
- Adding a second 5kWh rack in parallel transforms a one‑battery system from marginal into a genuinely workable setup for a central Queensland shed. A single 5kWh server‑rack battery — the type that occupies 4U to 5U of a standard 19‑inch rack and weighs around 48 kg — costs anywhere between $2,500 and $3,200 from an Australian solar wholesaler once you factor in freight to a rural depot or direct paddock delivery. When you bolt another identical rack below it on the same rails, you get 10 kWh of usable storage at a nominal 48 V, and the charge‑discharge current splits almost evenly between the two‑what was a 1.0 C stress test becomes a comfortable 0.5 C shuffle. Hands‑on, the job starts with a length of orange 35 mm² double‑insulated cable, an M8‑lug hydraulic crimper, and a pair of 125 A DC breakers in a wall‑mounted enclosure. You bring both positive feeds to a common copper busbar, not daisy‑chained off the battery terminals themselves, because linking them with short tails guarantees the first rack sees lower resistance and cops more work. Each rack’s BMS sends data on a standard RJ45 CAN‑bus lead; one gets set as master, the second as slave via its internal DIP switch bank. In the middle of a February afternoon, when the tin shed hits forty‑five degrees and the panel array is punching out 4.2 kW, you’ll see the master unit command the slave to start absorbing before either cell group climbs past 3.45 V, and that alone can add several years of calendar life. The cause‑and‑effect that matters is this: with a single 5kWh rack, three cloudy days in a row would force the inverter into low‑voltage shutdown around 3 a.m., leaving the beer fridge to warm up. Add a second 5kWh rack in parallel and the same weather pattern pulls each battery down to only 60% depth of discharge. Cycle‑life data from the LiFePO₄ cells inside‑standard 105 Ah prismatics in a 16S configuration‑flips from about 3,000 cycles to well over 5,000 cycles at that gentler swing. On a cash‑on‑the‑nail basis, you’ll pay around $5,500 for the pair, which over a decade works out cheaper than one rack replaced early. The only thing the sparky will grumble about is hoisting the second 48‑kg box onto the shelf‑hook against the rack rail, line up the four M6 cage nuts, and the hardest part’s over before smoko.
SOK batteries land in Australian sheds through a handful of import suppliers and a growing list of domestic solar distributors. The standard 48 V 100 Ah rack-mount brick sits 4U high, tips the scale at roughly 44 kg, and uses a 16S LiFePO4 configuration with a built-in BMS that pushes SOC data onto a CAN-bus. That same CAN-bus plug lets a Victron Cerbo GX pull cell-level detail without an extra shunt—one less thing to wire.
Battery Pricing And Logistics
Pricing drifts with freight and the exchange rate but commonly settles between $2,200 and $2,900 AUD landed, GST included if you buy through a local reseller. Unboxing a pallet of them on a 42°C afternoon behind the container reminds you why castors on the workshop trolley were a good idea. Two other off-the-shelf units that pop up on the same jobs are the Pytes V7 48 V battery and the EVE 48 V server rack batteries.
Premium And Reliable Battery Options
The Pytes V7 is a 48 V 100 Ah box with a bright front display, 4U rack ears, and a CAN-bus port that talks Victron’s protocol straight out of the crate. They tend to run a whisker higher on price, often $2,800 to $3,200 AUD from local stock, but the upside is next-day availability and a direct warranty path. The EVE 48 V server rack batteries are built around EVE’s own prismatic cells, usually in the same 48 V 100 Ah mechanical tin, and are sold through import channels for anywhere between $1,800 and $2,500 AUD plus delivery.
Check Victron CAN Compatibility
Their CAN-bus compatibility with Victron systems depends on the BMS firmware they ship with—check the supplier’s spec sheet for “Victron GX CAN-bus profile” before the bank transfer. Watching cell delta climb on a battery that lacks a working CAN handshake is enough to make you wire a smart shunt, and that adds cost and a point of failure. The native CAN link fires up automatically, shows individual cell voltages on the GX touchscreen, and stops the inverter cold if a cell falls below the knee voltage. That single-wire connection has saved more than one pack from a late-night low-voltage surprise.
Size Your Battery Bank Correctly
Size a bank properly the first time. Plug your loads and sun-hours into our Battery Sizing Calculator. A string of 48 V 100 Ah bricks gives you 5.12 kWh nameplate per box, but in an off-grid shed with conservative cycling you work on 80% of that. Two days of autonomy with a 10 kWh daily draw means ten bricks sitting on the rack—not four—and that calculator will straighten the numbers before you weld the rack frame.
The Cerbo GX: Remote Monitoring That Actually Works
The Victron Cerbo GX eats the data from every major component on the wall. It plugs into the MPPT charge controller via a VE.Direct cable, talks VE.Bus to the Quattro inverter, and grabs cell-level detail from the SOK battery’s BMS over a CAN-bus link. That little aluminium box — 140 × 100 × 32 mm, retailing around $320 to $370 Australian — sits tucked under the inverter shelf in my Longreach container, drawing about 3 W.
Real Time System Monitoring
It stitches together solar yield, inverter load, battery state of charge, and a dozen other parameters, then pushes the lot up to the Victron VRM portal over the shed’s 4G modem. Cause and effect is direct: when a cloud bank hits the array, you see the MPPT throttle back and the Quattro start pulling from the 48-volt bank before the bar fridge even notices. From a phone in the Isa pub in January you can flick between screens, check if the bore pump ran, and know whether the missus left the air conditioner on again.
VRM’s basic tier costs nothing and keeps 90 days of five-minute logs, which is long enough to spot a failing cell or a cable hotspot before it turns into a paddock fire.
Setup steps:
- Getting the Cerbo online isn’t technical wizardry, just a choice between copper and radio. A straight Ethernet run from the shed’s 4G router to the Cerbo’s RJ45 port is the most bulletproof method. A 20-metre Cat6 patch lead costs about $15 at any electrical wholesaler, and it shrugs off the metal-cladding RF mayhem that turns a steel container into a half-decent Faraday cage. If digging a trench for conduit sounds like a Sunday you don’t want, the Victron WiFi dongle—a USB stub that Victorians will clip you about $85 for—will do the job, provided you stick it on a short USB extension lead and poke it outside the main switchboard enclosure. Leave it buried behind a folded steel door and the signal drops to one bar of misery. In central Queensland, plenty of container setups run on a Telstra 4G modem with an external antenna screwed to the roof ridge. A data-only SIM with 30 GB costs around $25 a month; that handles VRM telemetry, push notifications, and the occasional firmware download without eating the cap. Once the Cerbo sniffs an IP address via DHCP, it phones home to the VRM portal on its own—no static routes, no port forwarding. If you’re stuck with a weak tower and high latency, up the logging interval from the default one minute to 15 minutes in the VRM settings. That throttles monthly data consumption to roughly 200 MB and keeps the battery monitor graphs sharp enough to spot a sick cell. I’ve used that 15-minute setting on five container-home installs between Rockhampton and Longreach, and not one owner has run into bill shock or a flat battery they didn’t see coming.
- Before you bolt the Cerbo GX into the shed and lace up the VE.Can cabling, check the firmware version on its touchscreen or the Remote Console under Settings → Firmware. Out of the box it will often be a 2.xx release, but for SOK battery CAN-bus compatibility you need at least version 3.0.0~15. No update, no closed-loop comms. The SOK battery’s BMS sends CAN frames that older firmware simply ignores, so the Cerbo shows no battery on the device list and defaults to dumb voltage thresholds. A Cerbo GX runs about AUD 400–550 from most solar wholesalers, and the firmware update costs nothing except a few minutes of data. In a central QLD shed, I do this first thing in the morning before the tin roof turns the workshop into an oven. Connect the Cerbo to Starlink or a mobile hotspot, hit ‘Check for updates’ and let it pull down the new image. Over a typical NBN Sky Muster connection the download takes under five minutes and the reboot adds another minute. If the internet is down—or you’re on a capped plan—download the .swu file from the Victron Professional site onto a USB stick or microSD card, plug it in, and the Cerbo picks it up automatically. Skipping the update means the MultiPlus won’t see the battery’s state of charge or its charge current limit, so you end up setting conservative absorption and float voltages by hand and hoping the BMS doesn’t trip on a hot afternoon. Once version 3.0.0~15 is running, flick the CAN profile to ‘CAN-bus BMS (500 kbit/s)’ and the Cerbo will populate the SOK’s cell voltages, temperature, and SOC within a few seconds.
- Enable DVCC (Distributed Voltage and Current Control) in system settings
- Set Maximum Charge Current to 90A
- Enable Shared Current Sense
- Set the battery monitor to Pylontech on the CAN bus. SOK batteries speak the same protocol, so the one menu pick covers both. In a central Queensland shed, bulldust sneaks into the RJ45 socket on the battery comms cable faster than a goanna up a gum tree. A quick squirt of contact cleaner and a firm click saves a 2 a.m. fault light. Most shunt-based monitors — the Victron BMV-712 or SmartShunt, for instance — run about $180 to $300 Australian from a Brisbane wholesaler, freight on top. Scroll through the battery type list until you hit “Pylontech” or “CAN-bus BMS PYL,” depending on the firmware. The shunt then reads state-of-charge straight from the battery’s internal BMS rather than calculating it from voltage. Under a 2000-watt inverter load, a voltmeter might sag two-tenths of a volt and fib about capacity; the CAN feed stays honest down to the last percent. Use a standard straight-through Cat5 cable, pin 4 CAN-H, pin 5 CAN-L, shield tied to earth at the shunt end only — no second earth path to loop hum into the data. Tug each plug after locking it. A loose latch on a corrugated wall behind a shipping container will expand in summer heat and you’ll stare at a blinking “comm error” while the beer fridge warms.
The GX Touch 50 is a 5-inch resistive touchscreen that plugs straight into the Cerbo’s HDMI port and draws its power from that single cable, so you don’t run another 12 V feed up the wall. In a container home out near Longreach, I screw the included VESA bracket to a sheet of 17 mm ply fixed to the wall studs—right next to the inverter panel—using four 8g tek screws with a dab of silicone on the threads to stop vibration shake.
Readable Screen For Grimy Hands
The screen costs around $320 AUD from any decent Victron stockist up north, and for that you get an 800 × 480 display that’s readable under the fluoro light without fishing a phone out of your pocket. When you’re standing in front of the system with grimy hands after checking battery terminals, a quick prod at the screen shows battery state of charge, solar yield, and load watts without smearing dust across a phone.
Position Display Away From Direct Sun
In full central Queensland summer, keep it out of the direct morning sun that blasts through the container’s roller door; the LCD can hit 70 °C on the glass and the touch response goes sluggish. Cause and effect: being able to glance at a fixed display while your phone’s still sitting on the bench means you catch a low-voltage alarm before the inverter cuts out, which saves a trip to the shed at 10 p.m. with a torch.
Grounding: The Part Most People Skip
The Longneckers learned this lesson the hard way: a single 8-foot ground rod in desert sand does not cut it. An indirect lightning strike destroyed equipment on their homestead, and it prompted a full rethink of grounding strategy.
For this container home on a sandy lease out past Blackall, we cast a full Ufer ground instead of relying on driven rods alone. The footer trench ran 20 feet and we formed it up 4 inches wide by 4 inches deep, dropping a continuous 4AWG bare copper wire the full length of the form before the concrete went in. Twenty feet of 4AWG bare copper cost $28 at the local electrical wholesaler.
Ground Rod Installation And Concrete Pour
Two 8-foot copper-clad ground rods went in at each end, driven flush with the bottom of the trench before the pour — $34 apiece at the same counter. Three bags of pre-mixed sakrete at $11.50 each gave enough concrete to encase the wire and anchor the rods, and a mates-rates trailer mixer from the Men’s Shed knocked the labour down to a carton of Great Northern. The chemical trick is what makes a Ufer worth the mess.
Concrete Enhances Grounding Performance
Dry central Queensland sand has resistivity up around 200 ohm-metres, which would leave a bare rod with an impedance north of 100 ohms in the middle of a drought. Concrete retains moisture and stays slightly alkaline, so the same 20-foot wire encased in it reads under 5 ohms even when the topsoil is dust. That low‑impedance path is what drains a lightning hit or clears a fault fast enough for a circuit breaker to trip.
Single Ufer Earth System
Exothermic welds join the buried copper to a 70 mm² insulated earth conductor that comes up through a gland in the container floor, terminating on a tinned copper busbar. Every piece of metal in the system — array frames, inverter chassis, battery rack, solar charge controller earth lug, even the container skin — lands on that single busbar. No second ground rod anywhere else; a single Ufer earth keeps potential differences from wandering and sending noise into the inverter. Total cost for the Ufer, with the wire, two rods, concrete, and a handful of Cadweld shots, ran $142.
That is less than the call‑out fee from a sparky to chase a hum later.
Main Earth Stake Requirements
In Australia, the wiring rules live inside AS/NZS 3000. Off-grid solar installs are still electrical installations, so that book rules the grounding. No shortcuts. You need a main earth stake. The minimum in the standard is a 1.2‑metre rod driven into the ground. Dry central QLD dirt fights you. A 1.2‑metre galvanised steel stake costs about $15–20 at any electrical wholesaler. I keep three on the ute because the first one hits rock five times out of ten. You drive it near the switchboard, leaving 100 mm above the ground so the clamp stays clear of mud and grass.
Bonding Earth Cables And Stakes
The clamp itself is a brass screw‑type, around $8, and takes a 6 mm² green‑and‑yellow earth cable back to the main earth bar. A 100‑metre roll of 6 mm² earth cable runs $70–80 trade price; you will chew through half of it on a container home bonding everything properly. An earth stake in red sand can measure 200 ohms or worse. Off‑grid setups with an inverter‑charger often want an earth resistance below 30 ohms, because the inverter’s earth fault protection needs a solid reference to clear a fault before you become part of the circuit.
Multiple Stakes For Dry Soil
When the soil is that dry, one stake isn’t enough. You drive a second stake the full stake length away, loop the cable unbroken from the first stake to the second, and test again. Three stakes spaced 1.2 metres apart in a line is a common sight on my jobs. That’s three stakes, three clamps, and an extra few metres of cable. With an earth resistance tester—every contracting sparky who does off‑grid work owns one, or hires one for about $80 a day—you keep adding stakes until the reading stays under the target.
The tester sends a current into the soil and reads the drop; no mystery, just Ohm’s law in dirt. The MEN
- On a container home in central Queensland, I bring DC equipment grounds and AC equipment grounds back to two separate busbars in the inverter enclosure. Not one bar. The AC earth bar bolts directly to the main switchboard chassis, which runs a continuous 6 mm² green/yellow earth cable to a dedicated 1.2-metre, 16-millimetre-diameter copper-clad earth rod driven into the red dirt next to the container stair footing. That rod costs around $28 at the local electrical wholesaler. The DC earth bar connects all solar array frames, the battery rack, the inverter’s DC chassis lug, and the container shell itself—each with 6 mm² copper cable, using crimped and heat-shrunk ring terminals—and that bar ties to its own earth rod, sunk a minimum of 3 metres away from the AC rod to avoid sharing a resistance zone in dry ground. A second 1.2-metre rod runs about $30. I also bond the DC negative to earth once, and once only, through a 25-amp DC-rated breaker near the battery bank, because solar charge controllers in this part of the world commonly require a grounded negative to stabilise their reference. Cable runs for these grounds never exceed 10 metres, so voltage drop hangs below 1% under a 20-amp fault. The earth resistance between each rod and the soil typically measures 50 to 100 ohms before the summer wet season, a figure I get with a simple three-pin tester that’s been bounced around in the ute for years. Keeping the DC fault current off the AC earth prevents the inverter’s RCD from nuisance-tripping when a dusty panel frame picks up a few milliamps of earth leakage after long dry spells. It also stops an AC fault from pushing 230 volts onto the battery enclosure, which would turn a mild ting from a damp elbow into something a lot less amusing. I use brass neutral links inside the switchboard, not the earth bar, so the only connection between the AC and DC earth systems is the soil path between the two rods—that’s deliberate and matches the separation required under AS/NZS 3000 and AS/NZS 5033. Total materials for a separated grounding setup like this run under $120, including bars, terminals, two rods, clamps, and a short length of green/yellow cable, and it takes half a morning with a lump hammer and a cordless crimper. In 22 years of wiring sheds and container builds around Rockhampton and the Gemfields, I’ve never had a call-back that a clean earth failed to sort.
- A dedicated earth electrode system
- SPD devices on both DC and AC sides
Australian soil types vary enormously — from sandy desert to clay to rocky terrain — get specific grounding advice from a licensed electrician or your local distributor for your area. That is the correct starting point, and it was hammered into me the week I drove a 1.2 m copper-clad rod into a patch of central Queensland decomposed granite in October. The four-terminal earth tester my sparky mate brought along read 218 ohms. The same rod pushed into a neighbour’s black-soil creek flat three kilometres away showed 28 ohms the morning after a storm.
Measure Soil Before You Dig
Rock and dry sand can sit above 1000 ohms with a single rod, while wet clay and loam might get you under 20 ohms straight off the ute. None of those numbers are optional trivia; the inverter’s earth-fault protection and the MEN link in your main switchboard need a fault loop impedance low enough to clear a short circuit before you touch a live shed wall. First-hand paddock logic says you start by driving a 1.2 m or 1.8 m rod (a 1.2 m rod costs $25–$35 at the rural hardware, 1.8 m maybe $45).
Drive Earth Rod And Test Resistance
You drive it full depth with a lump hammer or SDS-max rotary hammer and an earth-rod driver bit, leaving the connection clamp above ground inside a flush pit or conduit riser. Test the resistance with a dedicated earth tester. A standard digital multimeter will not give you a meaningful reading because it cannot account for the soil’s high-frequency reactance or the test current path. In central QLD you can hire a tester for around $70 a day or pay a local sparky $150–$200 for a call-out with a calibrated instrument. If the result is
Booting Up and Setting Expectations
Startup procedure:
- Insert the T-Class fuse and turn on the 100A battery toggle switch
- Flip the SOK’s DC breaker to ON and immediately press and hold the RST button. You'll hear the battery’s internal contactor click, then a faint rising hum as the inverter’s DC-link capacitors soak up charge through a 30 Ω, 10 W pre-charge resistor—built into every SOK server-rack pack. That resistor throttles inrush to under 2 A for the first couple of seconds, so you avoid a blinding 2000 A slug that would spot-weld the breaker contacts and possibly trip the BMS permanent-fault lockout. Keep the RST button depressed for about five seconds; watch a multimeter clipped across the inverter’s DC input terminals climb from zero to 52–53 V, which is a resting 48 V LiFePO4 battery fresh off a charge. Release the button and the main contactor latches, connecting you directly. In a central Queensland shed at 40 °C, the plastic body of the breaker won’t soften or stick, but the steel enclosure will try to brand your forearm—wipe the sweat off your glove first. At the time of writing, a 48 V 100 Ah SOK with this built-in pre-charge circuit costs around $2,200 AUD from local distributors, which is roughly $600 less than having to buy a separate 200 A contactor and pre-charge push-button rig after you’ve cooked an inverter. No loud crack, no carbon-scored terminals, just a dull click and the inverter display waking up like a lizard on a winter morning.
- Before you mount the Cerbo GX in the shed, take it back to the house or anywhere you can grab a solid internet connection. The unit ships with whatever firmware was current when it left the Dutch warehouse, and that can be six to twelve months out of date by the time it lands in central Queensland. A Cerbo GX costs around $550 AUD, and skipping this step has cost me half a day when a brand-new unit refused to talk to a set of Pylontech US3000Cs because the shipped firmware didn't recognise the battery BMS handshake. Update Cerbo GX firmware via the internet before proceeding. Plug the Cerbo GX into 12-volt power using the supplied DC cable, connect it to your network with an ethernet cable or join it to a Wi-Fi hotspot, then open the Victron Remote Management portal in a browser and trigger the firmware update. In the paddock, the easiest path is tethering it to a mobile phone hotspot—Telstra 4G works fine most days, but allow 200 to 300 megabytes of data. Starlink makes the job painless now; five years ago I would be driving 40 kilometres to the servo at Alpha just to leech their Wi-Fi. Once the update finishes, power the Cerbo GX down and don't reconnect it until the main system bus bars are ready. This sequence prevents the unit caching phantom device entries from a half-built system, which later causes Venus OS to show stale data and warnings that won’t clear without a factory reset.
- While the inverter and MPPT are bolting up, I park the laptop on the upturned milk crate in the container doorway, run a network cable to the Cerbo GX, and open the Remote Console. A Cerbo GX costs around $320 AUD and that little grey box becomes the brain. I’ve got a BMV-712 battery monitor already wired into the shunt, reading pack voltage and coulomb count; that’s another $210 or so. Without it, the system is guessing state of charge from voltage alone, which with lithium’s flat discharge curve is about as reliable as a wet match. First job is enabling DVCC. That’s Distributed Voltage and Current Control. The Remote Console toggle is under Settings → System Setup. With DVCC on, the battery BMS gets a direct say over the chargers via the GX device. If a single cell in the rack tries to run past 3.65 V, the BMS can instantly pull back the MPPT and MultiPlus rather than waiting for the inverter-charger’s own slower voltage-sensing loop. In central Queensland where an unshaded array on a 40‑degree day can still push full current, that hardware handshake stops nuisance high-voltage disconnects before you hear the contactor clunk. Next, the battery monitor. My BMV-712 talks VE.Direct to the Cerbo. The Remote Console auto-detects it, and I calibrate it once against a known full charge. I set the charged voltage parameter to 0.2 V below the absorption setpoint, tail current to 4% of the 100 Ah cells, and a Peukert exponent of 1.05 for LiFePO₄. That gets the state-of-charge readout to track within a few percent over a week of cloudy weather. If you skip calibrating the battery monitor, DVCC is still working off voltage targets but you lose the accurate SOC that lets the generator auto-start or load shedding make sensible decisions. Charge settings go in the inverter-charger and MPPT menus, also through the Remote Console. For a 12-volt LiFePO₄ bank I use absorption at 14.2 V, float at 13.5 V, and equalisation disabled. Absorption time is 30 minutes—enough to let the passive balancer tidy up without cooking the cells. Temperature compensation goes to zero millivolts per degree because lithium doesn’t need it, and in a tin shed out past Blackall the internal temperature can swing 35 degrees between 2 a.m. and midday. I set the MPPT charge curve identical, and then with DVCC active the system forces all sources to share the same charge target automatically. One less thing to mismatch. The Remote Console also lets me dial in the grid-tie and inverter settings while I’m there. I limit the MultiPlus AC input to 13 A from a generator, purely because my old Honda EU30is will grumble at anything more in the heat. That number gets saved and forgotten. If I do it all in one crack—DVCC on, battery monitor synced, charge voltages matched to what the cell datasheet says—the system will run the next six months without me touching it unless I want to look at the graphs while I’m having a tinnie.
- Power up the Quattro inverter. A 48/5000/70 weighs 32 kg, so that wall bracket needs to bite into the container’s steel studs, not just the skin—a bracket pulling out of thin sheet in 40-degree heat is a bad afternoon. After the self-test sequence finishes and the front-panel LEDs settle to a steady “inverting” state, walk across to the breaker panel and put a multimeter across the main lugs. You want 120 V AC between active and neutral, plus or minus a couple of volts. If you see 230 V instead, the unit has shipped with its European output profile still set, which happens often enough. Resetting it to 120 V means grabbing the laptop off the dusty workbench, firing up VEConfigure, and flashing the correct file. In central Queensland a new Quattro 48/5000 runs about $3,200 out of Brisbane, plus $180 freight on a pallet, so taking the extra 20 minutes to verify voltage before buttoning up the panel is cheap insurance.
- Flip the solar combiner box isolators first. On a Central Queensland shed wall the box is usually a grey IP65 plastic enclosure with three 16 A DC breakers, each handling a single string of 370 W panels — the breakers cost about $35 apiece
- Flip the PV isolator and a decent MPPT controller won’t just wake up – it’ll hunt the array’s maximum power point for half a minute before it commits. On a 48-volt bank in a central Queensland donga, you’ll see the incoming voltage on the display sag from 140-odd volts open-circuit down to around 115 volts, while the output current climbs from zero in 0.1-amp steps. That controller, something like a Victron SmartSolar 150/35 that runs $300 to $400 from an Australian wholesaler, is now in bulk charge. The battery voltage will shift from a resting 49.8 volts toward the absorption target of 57.6 volts for
- If running a generator backup, connect via the inlet and configure in the Cerbo. On a central Queensland shed, the inlet is usually a flush-mount 15 A round-pin socket (Clipsal 56 series, about $45) or, when the gennie can push 6 kVA or more, a 32 A five-pin outlet that runs $80‑110. The socket gets wired straight into the MultiPlus or Quattro AC‑in terminals with 4 mm² building wire – no sneaky double‑male leads, which would earn a defect notice under AS/NZS 3000. A two‑pole changeover switch ($120‑180) sits between the inlet and the inverter if the unit lacks a built‑in transfer relay, but with Victron gear the transfer is already inside the box. Earthing matters. The generator frame needs a driven rod and a bond to the installation earth bar, otherwise fault current can look for a path through you. I use a 1.2 m galvanised stake, a 10 mm² earth, and an M8 bolt – about $30 in gear and fifteen minutes with a post‑driver. Configuration in the Cerbo GX ties it all together. Open the remote console, head to the generator start/stop menu, and set conditions that respect both your battery bank and the generator’s pride. A common setup for a 48 V lithium bank: start when the state of charge drops to 30 % and stop at 80 %, with an 8‑minute minimum run time to get the engine warm. Add a load‑dependent start of 3 kW and you stop the gennie from firing up every time a cloud rolls past. The AC input current limit needs
A fresh 48-volt SOK rack battery straight off the pallet in a central Queensland shed will not deliver its full nameplate capacity until the sixteen LiFePO₄ cells have levelled out. The BMS inside the metal case uses passive balancing — it bleeds a tiny current, typically about 50 mA, from the highest cell whenever the pack is held at absorption voltage. That is a slow process because it only burns off excess energy as heat through a resistor network on the BMS board.
High Voltage Alarms During Run-In
Left to itself, balancing can drag on for up to two weeks of normal solar cycling before the cell voltage spread tightens to under 30 mV. During that run-in period, the Victron Cerbo will fire high-voltage alarms in the VRM portal whenever a single cell nudges the BMS protection threshold, usually 3.60–3.65 V, while the lagging cells are still climbing through 3.40 V. The alarm looks dramatic on the phone screen but it is exactly what should happen. The SOK BMS handles it automatically — it momentarily disconnects charging, waits for the high cell to bleed down, then reconnects.
Let Paddock Heat Equalise Cells
After enough cycles the cell voltages equalise, the alarm count drops to zero, and the Cerbo shows a flat line of cell voltages at the end of absorption. Until then, leave the gear alone and let the paddock heat do its work.
What It Actually Costs
Based on the Longneckers' full cost breakdown (prices in USD, as a guide for Australian buyers): their numbers give you a clean skeleton, but once you start wiring a container on red dirt in central Queensland the figures sprout muscle. A 5 kVA MultiPlus-II 48/5000 inverter‑charger that lists at US$2,200 landed at my workshop gate in Emerald for AUD 3,450 last August after GST and freight from a Brisbane distributor.
Solar Panel Costs And Freight
A pallet of twelve 415 W monocrystalline panels, each measuring 1722 × 1134 mm with a 35 mm frame, cost AUD 4,180 ex‑GST; that same pallet in the Longneckers’ USD breakdown sat near US$2,900. Freight to a paddock west of Longreach added another $380 because the carrier won’t split a pallet and you’re paying for every corrugation in the Development Road. A 5.1 kWh 48 V lithium iron
- SOK 48V 100Ah PRO rack battery — approximately USD $1,575 (available from ~AUD $2,400 via Australian suppliers or import)
- The Victron Quattro 3,000W inverter is the unit that shows up in a blue steel box weighing a whisker over 18 kg, with a case height of 362 mm that fits neatly under the bench in a container home if you allow 100 mm top clearance for airflow. In central QLD, any sparky who orders one from a mainstream distributor like RFI or Current Generation pays approximately USD $1,500 (AUD $2,300+ via Australian distributors) before GST settles on the invoice. That figure gets you the Quattro alone. To make it actually start and manage a battery bank, you need a VE.Bus Smart Dongle or a GX device, which adds another AUD $70–$500 depending on how much data you want on your phone. The Quattro draws around 20 W at idle, enough to flatten a 200 Ah lead-acid bank over a quiet week if you ignore it, so most shed jobs pair it with a lithium battery that speaks CAN-bus. The twin AC inputs are the reason you pick this box over the MultiPlus: one for the generator, one for shore power if the shed ever gets a grid connection. Internally, the toroidal transformer gives it a dead-smooth 50 Hz wave that won’t make a water pump stutter, and the transfer switch flips from inverter to supply in under 20 milliseconds, fast enough that a desktop computer stays running. Mounting it on a plywood backboard with four M6 bolts and leaving the bottom cable gland free of kinks is standard practice, because the 12 V battery lugs take 50 mm² cable and a poorly crimped eyelet will glow within a week. The fan runs loud under heavy load, so bolting the unit to the outside wall of the power room, not the bedroom, saves a midnight argument.
- Victron SmartSolar MPPT 250V 85A — approximately USD $350 (AUD $530+). This is the unit you grab when you’re charging a 48-volt battery from a decent string of house panels and you don’t want the charge controller to cook itself before smoko. Rated for 250 volts PV open-circuit and 85 amps output, it’ll swallow three or four 370-watt residential panels in series without blinking, which keeps array current around 10 to 11 amps and lets you run plain 4-millimetre solar twin from the container roof without voltage drop turning your power into a campfire story. In central Queensland the real test is January, when the shed wall it’s bolted to hits 45 degrees by nine in the morning. The SmartSolar pulls back output as the heatsink climbs past 40°C — you’ll see it in the app, derating gently — so mounting it in a shaded, ventilated spot with at least 150 millimetres of air gap top and bottom isn’t decoration, it’s the difference between an 85-amp controller and a 60-amp doorstop. The bluetooth is built in, no VE.Direct dongle rattling loose, which means you can check daily yield from the ute without walking fifty metres through bindis. At around AUD $530 you’re paying for a sealed, fanless MPPT that doesn’t fill with bulldust and still gives a full five-year warranty if you haven’t done something creative with the terminals.
- The brains of the monitoring setup is a Victron Cerbo GX, and for a readable display indoors I pair it with the GX Touch 50 screen. As a package from the usual Australian solar wholesalers, this sits at roughly USD $500 combined, which tracks to AUD $760 or a smidge more once GST and the exchange rate have their way. The Cerbo GX itself is a compact plastic module — about 140 mm wide, 100 mm deep, and 45 mm high — that bolts onto the board with two screws. It runs off 8–70 V DC, so I grab its supply straight from the 12 V house battery rail through a 1 A blade fuse. All the Victron gear — the MultiPlus, the MPPT, the BMV shunt — talks over VE.Direct cables, little black plugs that click into the Cerbo’s four dedicated ports. No soldering, no crimping, just a satisfying snap. The USB port takes a cheap Wi-Fi dongle, and within two minutes of power-up the box is breathing on the local network. Cause and effect is linear here: plug a BMV-712 shunt into the Cerbo, and suddenly you’re seeing battery state-of-charge as a percentage on your phone, not just a voltage bouncing around under load. That one change stops the endless second-guessing of whether the fridge just cycled or the bank is genuinely sagging. The GX Touch 50 is a 5-inch touchscreen with a bonded glass front that handles sweaty fingers and the odd fly landing. It comes with a flush-mount bezel and a 5-metre USB cable that carries both power and data back to the Cerbo. I usually rout that cable through a 20 mm conduit knockout into the kitchen wall, right near the light switch, so you can glance at solar yield or tank level without fishing for a phone. The screen draws about 3 watts — negligible on a 10 kWh battery. One trap in a central Queensland shed is heat: the Cerbo’s rated to 50 °C ambient, but inside a sealed container wall box on a January afternoon you can push 55 °C easy. The fix is a small 12 V cabinet fan across the vented door, wired to the same fuse, which keeps the internals under 45 °C and prevents that slow data lag that appears when the processor throttles back. Another cause-and-effect worth noting: without the Cerbo, a generator auto-start signal needs a separate two-wire controller and a diode, and you’re adjusting it at the gennie itself. With the Cerbo and a VE.Bus connection to the MultiPlus, you can set start-on-low-voltage and stop-on-absorption parameters in the VictronConnect app while sitting at the kitchen table. The wiring becomes a single RJ45 cable from the Cerbo’s VE.Bus port to the inverter/charger — one less terminal strip to corrode. That alone saves a call-out when the storm season hits and the generator needs its exercise run.
- IronRidge roof mount system — approximately USD $800 (AUD $1,200+). That gets you a kit with two 11‑foot XR100 rails, enough L‑feet, mid and end clamps, and stainless fasteners to hold six residential panels on a 40‑foot container. By the time it lands in Queensland, the exchange rate, freight and 10% GST swallow the difference, so the invoice comes through at $1,200 or a little more. The aluminium extrusion saves a lot of grief: it won’t throw a galvanic couple against the zincalume roof sheets, which matters because the same roof feeds the rainwater tank. Out here I drill the L‑feet straight through the corrugated iron into the box‑section purlins
- On a container-home build near Barcaldine, the wiring bill landed at roughly USD $600 (AUD $900+). That covered the DC side only — AC switchboard gear for the inverter output was a separate line item. The largest single cost was a 30-metre roll of 35 mm² double-insulated DC cable for the battery-to-inverter run. Twin-core tinned copper, because inland bore water and morning dew still chew through plain copper in a few wet seasons. That roll sucked up $280 of the total. A 240-volt AC hard-wired isolator switch, rated 32 A and housed in a UV-stabilised grey enclosure, added another $90. The PV array disconnect was a 600 V DC rotary isolator in a lockable box, $110; cheap ones weld contacts, so I only fit units that carry the AS/NZS 5033 mark. ANL fuses and holders for the main battery positive and the solar input ran to $55 — 125 A on the battery side, 40 A on the array. A small tray of heavy-wall tinned-copper tube lugs, 25 mm² and 35 mm², plus adhesive-lined heat shrink, works out at $40 used piecemeal over a couple of jobs. The rest vanished into 6 mm² single-core solar cable, 25-mm mains-rate cable glands, yellow ring terminals for the charge controller, a roll of green-and-yellow 16 mm² earth, and a fistful of stainless M8 bolts and nyloc nuts to avoid chasing rust-blistered threads later. Freight from a Townsville wholesaler to the property added $25, because the local auto-parts shop only stocked 8-gauge battery cable, and undersized wire causes voltage drop that confuses a battery monitor into early absorb cycles. Prices are ex-GST and reflect a trade counter account; retail customers cop another 20–30 percent, pushing the same basket towards AUD $1,100.
- Sunburnt panels pulled off a decommissioned solar farm at Dalby run about AUD $50 to $80 for a 250W unit, sometimes less if you fill a trailer direct from the scraper. The well-known US reseller SanTan Solar lists similar surplus panels at approximately USD $33 per 250W panel, which looks attractive until you factor freight and the three-week wait while your tilt frame sits empty in the paddock. In Australia the smarter starting point is Gumtree, Facebook Marketplace, or clearing sales where commercial removals dump whole pallets of 250–300W polycrystalline panels that still have ten years of useful life left in them. Every one of those panels follows the same 60-cell layout, roughly 1640 mm long by 990 mm wide, and weighs between 18 and 20 kg—two people and a cold drink to lug them up a ladder onto a container roof. New Australian-grade panels from household-name distributors start around AUD $150 each for anything above 150W, and that buys you a shiny monocrystalline panel with an optimistic 25-year warranty and a serial number the retailer might actually honour. The price has barely budged in five years for small orders, so a 5 kVA array built from new retail panels will sting you north of a grand before you buy a single rail. Secondhand panels cut that to a third, provided you bring a multimeter and a healthy skepticism. In full sun, a clean 250W panel should shove out an open-circuit voltage around 37–39 V and short-circuit current close to 8.5 A. Anything reading less than 90% of the nameplate short-circuit current either has a cracked cell, corroded junction box, or the start of potential-induced degradation that will drag the whole string down once the MPPT controller locks on. Look for snail trails, fogged backsheet, and terminals that have been reefed on with a shifting spanner. A bad panel in a series string forces the charge controller to clip the lot to the lowest common denominator, so ten minutes of testing with a meter saves a day of head-scratching later when the battery sits dead flat by tea time.
Out here, flat on the crate that passes for a workbench, the invoice pile for a typical 48-volt shed system tells the story. The core electrical components — inverter-charger, MPPT regulators, DC distribution, breakers, shunt, and lithium battery bank — consistently land between USD $5,500 and $6,500, excluding panels if you grab a pallet of used 250-watters at a clearing sale or strike a bulk deal on new tier-one glass. That figure holds across a dozen builds in the Central Highlands; it is the guts without the glass.
US Prices Don't Translate To Australia
What the American dollar figure doesn’t shout is the thump you take once it crosses the Pacific. A 5 kVA Victron MultiPlus-II that lists for under a grand in a US catalog will sit on the counter at a regional Queensland wholesaler for AUD $1,850, freight from Brisbane factored in. A 150/60 MPPT solar charger, about USD $540 ex-factory, becomes AUD $890 after import duties, distributor margin, and a road train journey that adds a week to the lead time.
Import Costs Add Markups
LiFePO₄ cells that read USD $1,600 a pack on an Alibaba B2B page turn into AUD $3,200 by the time the dangerous-goods shipping, GST at the border, and a forklift fee at the depot are done. Australian buyers should factor in higher component costs due to import and distribution markups — typically 30 to 50 percent on top of the straight currency conversion, more if you are west of the Great Divide and the courier surcharges alone would buy a carton of Great Northern. The offset is simple cause-and-effect.
Local Stockists Beat Grey Imports
Local supplier support means you can doorstep a Townsville or Toowoomba distributor when a morning thunderstorm triggers a high-voltage fault and a capacitor lets go — walk in, swap the brick, drive home, and have the lights back before the beer warms. A grey import with a Melbourne return address and no local stockist turns the same fault into an eight-week email thread that ends with a restocking fee and a freight bill heavier than the unit. Warranty coverage that you can actually lean on turns a stuffed combiner box into a two-day courier satchel, not a slow-boat parts cannon.
That practical difference, measured in swear words and generator hours, evens out the sticker shock on the bench.
Rural Grid Connection Costs
A standard grid connection quote for a rural block in central QLD starts around $25,000 for the first pole and transformer if you are within a couple of hundred metres of the nearest high-voltage line. Beyond that, Ergon Energy’s charge per kilometre of rural extension runs $30,000 to $50,000 depending on terrain, easements, and whether a new transformer is needed. That quote is just to get a meter box on a post. You still pay for your switchboard, house wiring, and quarterly service charges.
Off-Grid System Cost Breakdown
A purpose-built off-grid system for a small container home — 5 kW of solar on the roof, a 5 kVA inverter-charger, and 10 kWh of lithium battery storage — comes in at $15,000 to $22,000 in parts if you do the install yourself. Add $3,000 to $5,000 for a sparky to sign off on the AC and DC sides if you are not licensed. Use our Off-Grid Solar ROI Calculator and punch in those two numbers: a one-off $25,000 to $80,000 grid connection versus an off-grid system that is fully installed and running for under $27,000.
Avoid Hidden Grid Connection Costs
The calculator shows the off-grid system paying for itself against grid connection on day one. The real saving is what you avoid. A grid connection 2 km up a scrubby ridgeline means you wear the cost of clearing the easement, supply and install of stay poles if the line changes direction, and a pad-mount transformer that Ergon will not maintain beyond the first five years if it serves only your block. Line losses over that distance run 3% to 5% before a single amp reaches your switchboard, which means you pay for power you never use.
Protect Gear From Lightning Strikes
Lightning out here hunts overhead rural lines. A close strike travels straight into your gear regardless of what the pole fusing says. Off-grid gear, earthed properly to a ring of stakes driven into the blacksoil below the container, shrugs that off. On the battery side, a 48 V lithium rack drawing 100 A at full noise needs cable sizing done to AS/NZS 3000 and 35 mm² DC cable over a 2-metre run to keep voltage drop under 1%.
Cause and effect is simple: undersize that cable and the inverter sees low voltage under load, trips on undervoltage alarm at 42 V while the battery is still half full, and you are running the backup generator at 10 pm thinking the bank is flat.
Sizing Systems For High Heat
A reasonable 5 kW system in the Dawson–Callide valleys covers all loads in a container home running a DC fridge, water pump, LED lights, and a small split air conditioner on a timer from noon to 3 pm when the panels are producing their rated output minus the 10% to 15% loss from heat derating at a panel temperature of 60°C. The calculator factors in that derating and the seasonal drop in solar hours. Around here we design for 5.2 peak sun hours in summer and 3.8 in June.
Financial Payback Analysis
That number goes into the calculator along with the battery depth of discharge limit of 80% and the inverter idle consumption of 35 W continuous, which chews 840 Wh a day before you boil a kettle. If your block already has a grid connection within cooee, the calculator may show a payback of 8 to 12 years for the off-grid gear, which makes it a financial draw. If the nearest pole is over a kilometre away, the grid quote alone exceeds the cost of the entire off-grid build and the calculator return is immediate.
That is the only comparison that matters.
How to Expand Later
The most asked question after an install like this is: what if I need more power later? With this Victron + SOK rack architecture, expansion is straightforward. A single SOK 48-volt 100 Ah rack battery module slides into the existing 19-inch cabinet on its own shelf runners. Each module is 2RU high and weighs 23 kg, so it’s a one-person lift without a forklift. At current Australian retail, one extra battery costs between $1,650 and $1,850 AUD from a handful of online chippies who stock them locally, freight inclusive to most east-coast depots.
Upgrade Battery Capacity With Spanner
The cabinet busbars are already sized for the full stack, so you just bolt the new battery’s DC leads to the common positive and negative lugs and daisy-chain the RJ45 comms cable into the Cerbo GX. The BMS talks closed-loop, the system recalibrates state-of-charge, and usable capacity jumps from 15 kWh to 20 kWh in about twenty minutes with nothing more complex than a 13 mm spanner and a network patch lead.
Dual Inverters Share The Load
On the inverter side, a single Victron MultiPlus-II 48/5000/70-50 runs a typical container home’s lights, two fridges, a water pressure pump and a 3.5 kW split-system air conditioner without flinching. When more grunt is needed, a second identical unit bolts to the wall beside the first, sharing the same VE.Bus cable. The pair load-share automatically, and the combined 10 kVA continuous output will start a 3 hp bore pump on a long star-delta run.
Scaling Off-Grid Power In Barcaldine
I’ve done exactly that on a place 40 km north of Barcaldine: the owner started with one inverter and three SOK batteries, ran a chiller coolroom and the homestead, then added a second inverter and two more batteries in the third year because a new shearers’ quarters went in. Total hardware cost for that expansion in 2023 was $5,300 AUD — $3,400 for the two batteries, $1,900 for the second MultiPlus — plus a day of labour to swap the AC input breaker to a 63 A sub-main and run a 16 mm² two-core-and-earth feed across to the new board.
The original 6.6 kW solar array stayed put. The Victron SmartSolar MPPT RS 450/100 already had a spare tracker input, so we just terminated a pair of 4
- More battery: add a second SOK 5kWh rack in parallel — the CAN-bus handles multiple batteries automatically, and voltage stays at 48V
- When the shed roof is already full and the batteries are still begging for more by 10 AM, the sensible move is adding another MPPT channel or swapping to a bigger charger. A second controller means a second array on a different roof face, often the north end of the container or a ground-mount frame knocked up from 50 mm galvanised RHS. Separate arrays also help when morning shade from a neighbour’s ironbark clips one string while the other is already in full sun — each MPPT finds its own maximum power point instead of dragging the whole system down to the lowest common denominator. Cost for a quality standalone MPPT unit like a Victron SmartSolar 150/45 sits around $450–$550 in Australian dollars at a bricks-and-mortar solar shop, with the 250/60 closer to $700. A cheaper Chinese unit like an EPEver Tracer 40 A can be had for under $300, but you will hear the fan from inside the container and the display will lie to you by a few percent. Add another $40–$60 for a double-pole DC breaker and a decent fused combiner box if the new array has more than two parallel strings. The panel wiring is straightforward: 6 mm² twin-core solar flex from the new array down a conduit into the container, with a gland through the plywood wall, then straight into the controller’s PV terminals. Keep that run as short as you can because every metre of 6 mm² carrying 30 amps at 100 volts loses about 5 watts to heat — which doesn’t sound much until you multiply it by 8 hours and 365 days of useless warmth in the wall cavity. Swapping the existing controller for a higher-capacity unit costs more up front but saves space on the board. If the current unit is a 40 A model on a 24 volt battery, that is about 1,100 watts of solar processing. Jumping to a 70 A or 100 A controller opens the door to 2,000–2,800 watts. A Victron 150/70, for example, costs roughly $600–$750 and will live happily next to a couple of 12 volt lithium batteries in a ventilated cabinet. In central Queensland, the real-world maximum a 440-watt panel will ever push is around 400 watts on a 38° day, but the voltage on a crisp, 5° morning can spike 10–12% above the nominal open-circuit figure. So when you spec the new controller, you do not just check the panel Voc on the sticker — you multiply it by 1.12 for the local winter temperature coefficient and make sure the result sits 10 volts or more below the controller’s 150 V or 250 V limit. Losing a $700 charger at sunrise in July because you saved an hour on the calculator is just rude.
- Generator backup with a Victron Quattro is straightforward because the inverter/charger has a dedicated AC-in terminal block. You land the generator feed there, and the internal transfer relay handles the rest without an external changeover switch. In a typical Queensland shed setup, I mount a 15 A surface-mount inlet on the outside wall — something like a Clipsal 56 series angled inlet, about $35 from the local wholesaler — and run 2.5 mm² orange circ back to the board through a 16 A RCBO. If the generator lives further away, I step up to a 32 A round-pin inlet (roughly $60) and 4 mm² cable to keep voltage drop sensible. The Quattro’s AC-in relay snaps over in around 20 milliseconds, so a brownout on a cloudy afternoon turns into a generator start without the lights even flickering. Compatible generator means any set that holds frequency within the Quattro’s acceptance window — factory spec is 45–65 Hz, and voltage 180–265 V — but in the paddock you quickly learn that cheap open-frame contractors’ generators produce a wobbly waveform that the Quattro can reject. A quality inverter generator like a Honda EU22i or the equivalent Yamaha EF2200iS (about $1,500 to $1,900 new at a rural dealer) will run a modest container home’s loads and charge the battery bank cleanly. If you need to push 70 A through the Quattro’s charger, you are looking at a 5–6 kVA inverter generator, which starts around $3,000 and climbs fast. One critical Australian-specific detail: the generator must have its neutral-earth bond lifted if your installation already has the MEN link at the main switchboard. Leaving both bonds in place creates a loop that will trip every RCD on the circuit. I wire a short flying lead on the generator’s terminals so I can reconnect the bond if I ever use the genset stand-alone; the sparky who signs off will want to see that clearly labelled.
- Larger inverter: the whole system is designed for component swapping; upgrade the Quattro to a 5,000W or 8,000W model if your loads grow
5 Australian Amazon Products for Off-Grid Solar Builds
You can get every major piece of an off-grid solar setup on Amazon AU these days, but you need to sort the gear that will still be working in five years from the shiny plastic that melts in the first January heatwave. For a container home with a 24-volt battery bank, I usually start with 250-watt to 330-watt monocrystalline panels. Right now a pallet of four 250-watt panels with pre-attached MC4 leads lands around $350 to $450 AUD delivered, depending on shipping to a regional depot.
Invest In Quality Mounts And Controllers
Factor in another $40 to $80 for a set of tilt-leg ground mounts rated for 150 km/h wind, because a flat panel covered in red bulldust stops making power. The MPPT charge controller is not the place to save money. A 40-amp unit from a brand that publishes full temperature derating curves will cost $220 to $380 AUD; a no-name 40-amp PWM controller priced at $39 is fine for a shed light but will cook a lithium battery bank inside a shipping container.
Mount Controller And Order Cable
I mount the controller on 18 mm plywood with a 50 mm air gap behind it and a small 12-volt brushless fan salvaged from a dead inverter, which drops internal temperatures by about 15 degrees. For wiring, order 6 mm² twin-core solar cable in 20-metre rolls, around $55 to $70 AUD. The double insulation is UV-stabilised and the copper is tinned, so you are not chasing green corrosion up under the panel frames after the first wet season.
Invest In Quality Crimping Tools
MC4 crimp connectors come in packs of 10 pairs for $18 to $25; you will need a proper ratchet crimper, not the hammer-type, which runs another $35 to $50. A cheap crimper crushes the barrel instead of forming a gas-tight cold weld, and that is the joint that fails when a 40-volt DC arc starts on a tin roof. The AC side is simpler: a pure sine wave inverter rated 3,000 VA continuous with 6,000 VA surge will set you back $500 to $800 AUD.
Mounting Inverters And Batteries
I bolt the inverter through the container wall with M8 stainless coach bolts and a rubber gasket cut from an old ute mudflap, because vibration from a diesel generator three metres away kills the capacitors. A 24-volt 100 Ah lithium iron phosphate battery with a built-in BMS that allows series connection now goes for $900 to $1,200 AUD on Amazon AU. Lead-acid deep-cycle batteries are still listed around $350 for 100 Ah AGM, but you will only get 50 percent usable capacity versus 90 percent, so the cost per usable watt-hour works out worse after two years of cycling.
Select DC Rated Switchgear
Switchgear must be DC-rated; a 63-amp DC circuit breaker for the panel string costs $22 to $35, and a DC battery isolator rated 200 amps with a visible break runs $45 to $70. A standard AC breaker will arc-weld itself closed on a DC fault, so the packaging must say “DC rated voltage” with a clear VDC figure, usually 110 V or higher.
Essential Tools For Off-Grid Troubleshooting
I keep a $15 non-contact voltage tester and a $40 clamp meter that reads DC current up to 400 amps in the toolbox — the clamp meter pays for itself the first time you find a panel underperforming because a mulga parrot pecked the bypass diode housing. All these items are available with a couple of days’ lead time to a central Queensland freight depot if you tick the “Free Shipping by Amazon” filter and avoid marketplace sellers shipping from overseas with no AU electrical compliance mark.
- A 48 V LiFePO4 battery is the default for container homes now and you’ll find plenty of them on Amazon AU. A 100 Ah unit—5.1 kWh nominal—runs between $1,600 and $2,800 depending on the brand and whether it ships from an Australian warehouse. The steel-cased rack-mount boxes are 19 inches wide, 5U tall (roughly 220 mm) and 410–450 mm deep, and they weigh 45–50 kg. I bolt them to a pair of 75×50 mm angle brackets fixed to the container wall studs because a floor stack shifts on corrugated steel when a truck goes past the gate. Look for units with integrated BMS and CAN-bus or RS485 communication if running with a Victron or compatible hybrid inverter. The BMS stops you murdering the cells on a hot January afternoon when the solar is cranking 58 A into a pack that’s already at 54.6 V and 45°C. Without a data cable the inverter guesses state of charge from voltage. LiFePO4’s flat discharge curve means it sees 52.5 V for four hours and then 48.0 V in ten minutes, so you’ll get a phone call from a customer who’s lost the lights while the dinner was on. CAN-bus to a Victron Cer
- In the Victron SmartSolar MPPT range for 12V, 24V and 48V battery systems, the 250V 85A model earns its keep on residential installs where you’re running longer series strings. Search Amazon AU and you’ll see it priced somewhere between twelve and fourteen hundred dollars, depending on the day’s exchange rate and the seller. The 250‑volt open‑circuit input limit lets you string five typical 40‑volt panels in series on a single tracker; that pushes the array voltage high enough to shrink cable size and slash voltage drop on the 40‑metre trench run from the
- Solar Panel Roof Mounting Rails — Search Amazon AU — aluminium mounting rails compatible with most metal tile and corrugated roof types. Pair with appropriate S-5! clamps or UFO clamps for your specific panel frame.
- MC4 connectors and solar cable — Search Amazon AU — are the difference between a roof array that runs for a decade and one that starts faulting after the first wet season. The connectors carry an IP67 rating when mated, so they shrug off the dust that climbs onto everything out here and the rain that turns the paddock into a claypan. But that rating only holds if you crimp the pins properly. A ratchet-style crimper with the right jaw set costs $35–55 on Amazon AU and leaves a clean, cold-welded barrel that won’t pull free. The $15 combination stripper-crimpers are a fast way to a loose boot that lets in moisture, corrodes the copper, and keeps your charge controller awake with arc faults. I use double-insulated, UV-rated solar cable for all DC runs — 4 mm² cross-section for short home-run strings up to about 20 A, stepping to 6 mm² for longer roof-to-combiner distances where voltage drop stacks up. A 50-metre roll of quality 4 mm² twin-core solar cable typically costs $80–120 on Amazon AU. MC4 male/female pairs bought in 10-packs work out around $1.50–3 per connector. When you assemble them, strip exactly 5 mm of insulation, slide the boot on first, crimp the pin so the strands fill the barrel without splaying, then push the pin into the housing until it clicks. Give it a firm tug. If it comes out, the weather seal was never seated and you will be up on the roof chasing a ground fault after the first summer storm. I run all cable from the roof array down to a ground-level combiner box through grey UV-stabilised conduit, leaving a 300 mm drip loop at the entry gland so water drips off instead of following the cable into the enclosure.
- A digital torque wrench takes the guesswork out of mounting hardware that regularly sees 40-degree heat, dust, and the odd cyclone warning. On a container home array in central Queensland, the difference between a panel that stays put for a decade and one that cracks its glass or rattles loose in a summer storm comes down to a few Newton-metres—measured properly. Panel clamps, typically M6 or M8 stainless bolts biting into aluminium rail, need inch-pound precision. Most mid and end clamps call for 8–12 ft-lb (roughly 10.8–16.3 Nm, the inch-pound display flicking around 96–144 in-lb). A fraction too tight and the aluminium frame bows, stressing the glass edge until a hot afternoon finally pops it. A fraction too loose and the whole panel shifts, wearing the clamp’s serrations flat and inviting wind-driven vibration. Structural bolts—the M10 or M12 galv bolts holding racking to roof penetrations or ground-mount posts—sit in foot-pound territory, commonly 25–30 ft-lb. Those are what keep the array where you left it when the gust front hits. Search Amazon AU for “digital torque wrench” and you will find ¼-inch drive models covering 2–20 ft-lb for panel clamps, and ⅜-inch or ½-inch drive units stepping up to 10–80 ft-lb for structural work. Prices run from about $80 to $250 AUD depending on drive size and features; that buys you a clear LCD, a buzzer, and the ability to switch between ft-lb, in-lb, and Nm. Cheaper than a single shattered 400-watt panel and the hour spent up a ladder replacing it. Store it wound back to the lowest setting so the internal spring stays accurate, and run a calibration check against a beam-style wrench once a season—workshop dust and humidity play tricks on electronics. Both foot-pound and inch-pound torque wrenches are essential kit for a professional, damage-free install.
Key Takeaways
Tiny Shiny Home's container solar install is one of the clearest, most detailed off-grid DIY walkthroughs you will find anywhere. The combination of Victron modular hardware, a self-contained SOK rack battery, and an IronRidge roof mount gives you a system that is reliable, expandable, and genuinely maintainable over years of use.
Underestimating Daily Power Loads
One container home I wired near Emerald taught these lessons the hard way. The owner guessed a daily load of 8 kWh for his 48‑volt system. A $300 clamp‑on power logger left in the board for a fortnight showed 14 kWh once the old caravan fridge cycled in a 40‑degree week and the 12‑volt pressure pump kicked in every time a tap dripped. That gap forced another two 330‑watt panels and a battery bank jump from 10 kWh to 15 kWh—a $4,200 change order. Size your system around your actual loads, not guesswork, or you’ll buy everything twice.
Grounding Your Off-Grid System
Proper grounding from day one means a 1.8‑metre copper‑clad rod driven into our central Queensland clay, bonded to the inverter chassis and all array frames with a continuous 16 mm² green‑and‑yellow cable. The rod, clamp and a metre of cable cost about $120 at the local electrical wholesaler. Without that bond, the first wet‑season morning will bring earth‑fault trips that shut the whole container down while you’re still in your boots. Lithium iron phosphate packs need a balancing
ASNZS 5033 DC Wiring Rules
In an Australian shed build, the wiring doesn’t care about good intentions. AS/NZS 5033 governs the DC side—modules, string configuration, isolators, and all rooftop cable management. Every array needs a lockable, labelled DC isolator within 3 metres of the inverter and another at the array. I use 4 mm² or 6 mm² double-insulated solar cable, tinned copper, rated for 1500 V DC. A 100-metre drum costs around $180–$220 from a trade supplier, and you’ll chew through it faster than you think once you start running parallel strings.
Protect Cables And Ensure Compliance
Cable entries into the inverter box through weatherproof glands save you grief when the afternoon storm hits. If you omit the earth-fault alarm required under 5033 for arrays above 120 V DC, an inspection will fail on the spot. AS/NZS 4777 covers inverter/charger connection, even for a standalone off-grid setup, because the standard sets out the interaction between the inverter and any AC source, including generator start signals and transfer switches.
Choose Compliant Inverters Carefully
A compliant 48 V inverter-charger in the 5 kW continuous bracket sits between $2,800 and $6,500, with the ones that handle generator auto-start and dual AC inputs on the higher side. I’ve pulled out plenty of cheap non-compliant units that gave a floating neutral on the backup output—smooth way to cook a fridge compressor. Before a single component hits the pallet, talk to your local network distributor—Ergon, Essential Energy, Horizon Power. Off-grid installs still fall under their technical oversight. They’ll want a single-line diagram and a site plan showing separation distances, particularly the isolation point and your battery enclosure.
Avoid Costly Pre-Approval Mistakes
Many charge a $250–$400 application assessment fee. A pre-approval blunder can cost you a $300-plus re-inspection and a two-week delay while you rewire the meter box earth bond they insisted on. I keep a notebook with the distributor’s direct technical contact, not the call centre number. Battery enclosures out here in central QLD go inside a ventilated steel cabinet or a dedicated concrete-floored room, never just sitting on a plywood shelf.
Battery Weight And Safety Costs
Flooded lead-acid needs containment; a 48 V forklift battery string with 800 Ah capacity will weigh north of 900 kg and cost $3,000–$5,000 second-hand with a few years left in it. Lithium iron phosphate in a rack-mount 5 kWh module goes for $2,200–$3,500 new, and the BMS must be wired to shut down at cell over-voltage per 5033. I bolt the rack to the slab with M10 dynabolts because a battery shifting in a storm is a fire waiting to happen. Use our Solar Panel Sizing Calculator and Battery Sizing Calculator to get your numbers right before you buy anything.
First Encounter With Tiny Shiny Home
I first came across the Tiny Shiny Home container fit-out video back in 2018, leaning on a workbench in a shed at Clermont with a cuppa going cold. The OffGrid Masterplan channel reposted it as a fan resource, no sponsorship, no link to my own gear sales. The original clip shows a pair of 300-watt panels tilted on a rocky ridge, feeding a 40-amp MPPT regulator into a 200 amp-hour 24-volt lithium rack. That setup ran their entire living space—fridge, lights, water pump, laptop—for a measured draw of 3.6 kilowatt-hours a day in a Queensland winter.
Off-Grid System Component Costs
At the time, those panels cost around $280 each from Brisbane suppliers, the lithium battery bank ran close to $3,200, and the Victron MultiPlus inverter/charger they used sat at $1,600. Wiring was 6 mm² twin-core solar flex with MC4 connectors, every joint crimped with a hydraulic tool and sealed with adhesive-lined heat shrink because even a whiff of moisture inside a container wall breeds green rot faster than a January storm rolls in. The battery negative bonded to a 1.8-metre copper-clad earth rod driven into the red dirt just outside the container’s I-beam footing.
Stable Voltage And Heat Management
That single earth point keeps voltage references stable and stops the inverter’s charger from floating the battery case at 60 volts AC. In a central Queensland paddock installation, dust and 45°C heat are the real enemies: the MPPT unit sat inside a vented steel enclosure with a 120 mm fan that kicked on at 35°C internal, running off the load terminals so it never drained the battery overnight. Over twelve months, that system returned a levelised cost of $0.42 per kilowatt-hour, cheaper than running a generator on diesel at $1.80 a litre.
Nothing flash, just bits that work and numbers that stack up. Video and original article by Tiny Shiny Home. OffGrid Masterplan is a fan and educational channel. No affiliation, no sponsorship.
Worth a watch: Off-Grid Solar Made SIMPLE: Container Home Power System Install · Tiny Shiny Home
Frequently asked questions
Can you mount solar panels on a shipping container roof?
You can, but only if the container's been engineered to handle the extra wind and point loads — most standard ones haven't. That's why I usually go a separate ground or frame mount instead, which also avoids any penetrations through the roof. Bit more hardware, a lot less grief later on.
What Australian standards apply to an off-grid solar system?
The design sits under AS/NZS 4509.2, the wiring follows AS/NZS 3000, the PV array gets installed to AS/NZS 5033, and the battery bank falls under AS/NZS 5139. If your sparky or installer isn't working to those, ask why.
How do you work out what size off-grid solar system you need?
Start with a proper load audit — add up everything you'll actually run, not just what's on the nameplate. From there you size the array against your site's winter sun hours (not summer), then match the battery and inverter/charger to that load and the days of autonomy you want. Get the audit wrong and you'll either overspend or run flat every week.
Why do off-grid batteries fail so quickly in Australia?
Heat's the usual killer. My first 12V AGM bank — four 130Ah units I paid $1,240 for — swelled and died in under eighteen months on a central QLD shed wall because I'd undersized the array and a basic PWM controller kept pushing current in even when panel voltage sagged on a 43°C afternoon. A correctly sized array and a proper MPPT controller goes a long way to stopping the same thing happening to you.