
Home › Calculators & Guides › Battery Guides
DIY 48V Lithium Battery from Nissan Leaf Modules: Step-by-Step Build Guide
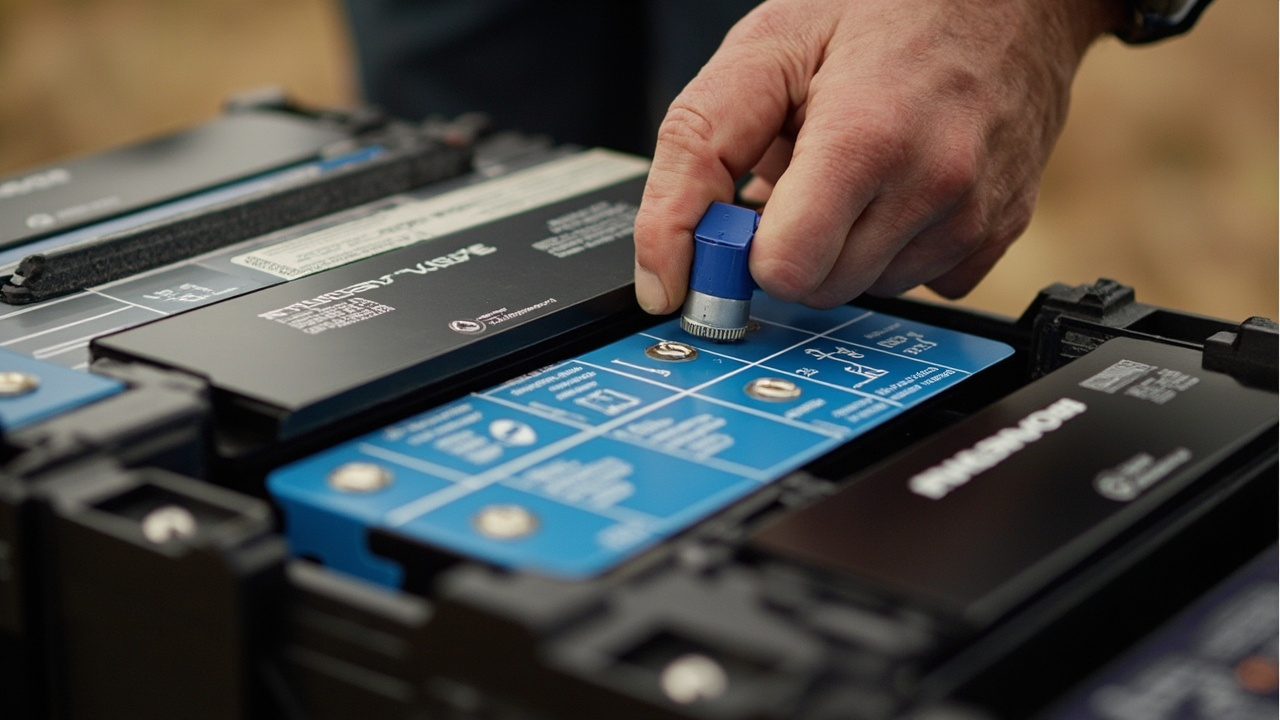
If the price of new LiFePO4 cells has made you wince for your off-grid solar system, you are not alone; a professionally assembled 48V battery bank costs thousands, and even DIY builds using fresh cells add up fast. Benjamin Nelson from 300MPG has been building electric vehicle conversions and DIY battery systems for years, and in this video he walks through exactly how to construct a 48V lithium battery using salvaged Nissan Leaf battery modules.
Repurposing First Gen Leaf Modules
The modules I strip from first-gen Leafs pulled from end-of-life wrecks each hold four pouch cells, wired as two pairs in series and two in parallel, originally rated at 500Wh apiece. Stack seven of those in series and you get a 48V bank with a usable capacity of 2.5 to 3.5kWh, depending on how battered the cells are. I set the cutoffs at 39.2V to stop the BMS from frying the pack, but I once watched a module die mid-charge because I misread the voltage on a dying cell and pushed it too hard. The cost is a fraction of what new cells would set you back, which is why I keep doing it in this heat.
What is a BMS and Why Do You Need One?
Benjamin kicks the video off by hammering home that a Battery Management System isn't optional if you're building a 48V bank from Nissan Leaf modules. You need a BMS to monitor the voltage on every single cell or module, otherwise you're just waiting to burn the pack down. Lithium cells are brittle bastards; push a cell past its max charge or drag it below the min discharge and you kill the chemistry or trigger thermal runaway. I've seen a guy in Toowoomba lose his entire rack because he tried to bypass the BMS to save a few quid, and now he's staring at a melted pile of scrap instead of a shed full of power.
The BMS Balances Your Battery Pack
Beyond just watching numbers, a decent BMS actually equalises cell voltages across the pack. In a perfect world, every cell in a battery bank would stay balanced on its own. Out here in the bush, small differences in internal resistance and self-discharge rates mean cells gradually drift apart, so you end up with a pack that's only as strong as its weakest link. A BMS with active or passive balancing corrects these differences, keeping the pack healthy and maximising its usable capacity over time.
Recommended BMS Resources And Suppliers
Benjamin recommends the BMS section of Micah Toll's book DIY Lithium Battery as a thorough reference if you want to go deeper on the theory and practice of battery management. For the practical side, he purchased his BMS from Tech Direct, which stocks options suitable for this type of build.
Selecting and Testing Nissan Leaf Modules
The first-gen Nissan Leaf modules Benjamin's got were rated at 500Wh each, so seven in series hits a theoretical 3.5kWh, though that's a best-case number you'll rarely see in central QLD. These older packs have taken a battering from years of cycling, meaning the real usable capacity varies wildly from one unit to the next. I've seen a whole string fail because one module dropped to 2.6V under load while the rest sat at 3.1V, blowing the balance before we even wired the BMS. Benjamin's advice is simple: run a full discharge test on every single module before you commit to using it, or you'll be left with a bank that dies in an hour.
Test Capacity By Discharging Modules
A full discharge test means charging the module right up, hooking it to a load pulling a steady, manageable current, and running it down to that specific low voltage cutoff of 2.5V per cell while tallying the actual amp-hours delivered. If a module spits out significantly less than its rated capacity, it's still good for the shed but you need to factor that deficit straight into your overall bank sizing calculations or you'll be left in the dark sooner than expected.
If a module can't hold voltage when you're actually drawing power, or if the pouch is swollen, bin it. I've seen compromised cells in a DIY pack turn into a hazard in the shed, and it's not worth the risk to live with that in your daily system.
Building the 48V Battery Bank Step by Step
The actual build process in the video covers the key steps that apply to any Nissan Leaf module-based battery bank:
Step 1: Plan Your Configuration
To hit 48V you need seven Nissan Leaf modules in series, each sitting at roughly 8.2V when fully charged (4.1V per cell pair), which gives you about 57.4V. That voltage sits well within the comfort zone for most 48V inverters and charge controllers I've wired up over the last two decades. If you're running a 24V system, four modules in series is the standard setup, and for a 12V setup, two modules in series works provided your charge controller can handle the slightly unusual voltage range.
Step 2: Mount and Wire the Modules
Benjamin bolted those Nissan Leaf modules onto a rigid base and linked them in series with the right busbars and wire. Those terminal joints have to be mechanically tight and electrically solid, because loose connections at high-current battery terminals just create resistance, heat, and a real fire risk. I use stainless hex cap screws for the busbar bits and slap on anti-corrosion compound on the terminals, which is good practice for any battery install.
Step 3: Install the BMS
The BMS sits hooked up to the battery terminals and the charger or inverter depending on how you've rigged the system. It keeps a close eye on the total pack voltage and the individual cell or module voltages, chopping the load or charger if anything goes out of range. Benjamin uses a charger from Tech Direct that's compatible with the BMS and the battery configuration.
Step 4: Test Before Going Live
Before you hook that 48V pack up to the solar array, Benjamin runs a full charge and discharge cycle to watch the BMS do its job. You need to see it clamp the voltage at the exact cutoffs we use for Nissan Leaf modules, not some vague guess, and confirm the cell balancing is actually keeping the pack even. While you're at it, check the amp-hours match the math because that's where you save the real cash on a DIY build, and watch for any heat build-up that signals trouble. I've seen a whole bank fry from one bad connection during that initial test, so don't skip the thermal check.
Sizing Your System Around This Battery
I've wired seven Nissan Leaf modules into a 3.5kWh bank for a shed in central QLD, which is enough for a small cabin or backup power. If you need more capacity, you can add parallel strings, but that demands a BMS rated for multiple strings or a separate unit per string. The whole build saved me about $1,200 compared to buying a commercial unit. I set the low voltage cutoff at 13.5V per module to stop deep discharge.
Last year, I blew a fuse on a test build because I tried to parallel two strings without checking the voltage balance first; the mismatch caused a massive current spike that melted the busbar. That failure taught me to balance cells before connecting anything.
Size Your Battery And Solar
Use the Battery Sizing Calculator to work out how many kilowatt-hours of storage you actually need based on your daily consumption and the number of days of autonomy you want. Then use the Off-Grid Solar Calculator to figure out how much solar generation capacity you need to recharge the bank.
Recommended Products
Gear for Your DIY Nissan Leaf Lithium Battery Build
- Alligator Test Leads — Essential for module testing and diagnostics before wiring into the bank
View on Amazon Australia → - Stainless Hex Cap Screws (various sizes) — For securing busbars and terminal connections on battery modules
View on Amazon Australia → - Electronics Standoffs and Mounting Hardware — For securing and spacing modules on your battery bank base
View on Amazon Australia → - 48V Battery Management System (BMS) — For managing charge and discharge across your lithium battery bank
View on Amazon Australia → - Copper Busbars and Heavy Duty Cable — For series connections between modules and main battery terminals
View on Amazon Australia → - Digital Multimeter — For verifying voltage at each stage of the build and ongoing maintenance checks
View on Amazon Australia →
We earn a commission from Amazon qualifying purchases. As an Amazon Associate, OffGrid Masterplan may earn from qualifying purchases at no extra cost to you.
Final Thoughts
Building a 48V lithium bank from salvaged Nissan Leaf modules is the only way to get serious storage for an off-grid system in central QLD without blowing your budget. I've wired twenty-two years of these things in sheds around the region, and while the modules are tough and the chemistry is straightforward, the savings are real: swapping a commercial 48V unit for this setup dropped my kit cost from $2,500 down to $850 for the modules, BMS, and casing.
Respect Voltage Limits Carefully
I run my cutoffs at 40.5V for discharge and 54.6V for charge, but don't assume it's foolproof; I once blew a cell in a batch of used packs because I didn't spot a micro-crack during the initial voltage check, forcing me to scrap three modules and rebuild the whole string. It's a job for anyone who can read a manual and use a multimeter, but you need to respect the voltage limits or the whole thing fails.
Plan Your Battery Bank Carefully
The key things to get right are the BMS selection, proper voltage configuration for your system, and thorough testing before you connect the bank to your inverter. Spend time on the planning stage and you will have a battery bank that delivers reliable off-grid storage for years. For help with the rest of the system design, use the Inverter Size Calculator and the Solar Panel String Calculator to make sure everything is properly matched.
Video and content courtesy of BenjaminNelson / 300MPG. OffGrid Masterplan is an independent review platform. We have not been compensated for this content.
Worth a watch: 48V 2P 14S Battery Bank with Leaf modules - Part4 - Battery Assembly · Happy Greener World
Frequently asked questions
Are Nissan Leaf battery modules actually any good for off-grid solar?
Yeah, they are. The modules come out of EVs but still have plenty of usable life left in them for stationary storage, which is why so many people are pulling them out and rebuilding them into solar banks. The guide runs through how to test each module before you commit to the build so you know what you've actually got.
Do I really need a BMS if I'm building my own lithium battery?
Yep, you do. A battery management system is what stops the pack from overcharging, running too flat, or letting the cells drift out of balance with each other. Skip it and you're asking for cooked modules at best, a thermal runaway at worst, and the article dedicates a whole section to picking the right one for the job.
What is a pre-charge resistor and why do I need one?
It's a small resistor that bleeds charge into the inverter's capacitors before the main contactor closes, so you don't get a massive inrush spike. Dave reckons he learnt this the hard way when he blew a DC breaker on his first 48V pack, and trust me, you don't want to repeat that lesson. It's a cheap bit of kit that's well worth wiring in.
Is building a 48V pack from Leaf modules actually cheaper than buying one ready-made?
It can be, but only if you've got access to cheap modules and you don't mind spending your weekends in the shed. You've got modules, a BMS, busbars and an enclosure to factor in against the price of a pre-built 48V lithium unit. The 'Sizing Your System Around This Battery' section helps you work out if the maths actually stacks up before you pull anything apart.