By Mick O'Brien · carpenter & builder · sheds-to-homes, cabins and things that stay up in a storm
Forget fancy solar heaters and expensive off-grid systems. A compost-heated greenhouse is the cheapest, most reliable way to keep your vegies growing in winter without a single watt of grid power. It’s not magic—it’s biology. And it works like a charm in Australia.
By Mick O'Brien · carpenter & builder · sheds-to-homes, cabins and things that stay up in a storm
I built my first compost-heated greenhouse in 2011 out the back of my workshop in Gippsland, Victoria, because running electric bar heaters through winter was costing me $340 a quarter just to keep a few trays of seedlings alive. The structure itself was a 6m x 3m timber frame clad with secondhand corrugated iron on the south side and twin-wall polycarbonate on the north, set on a 100mm concrete slab with a 50mm fall toward a central drain.
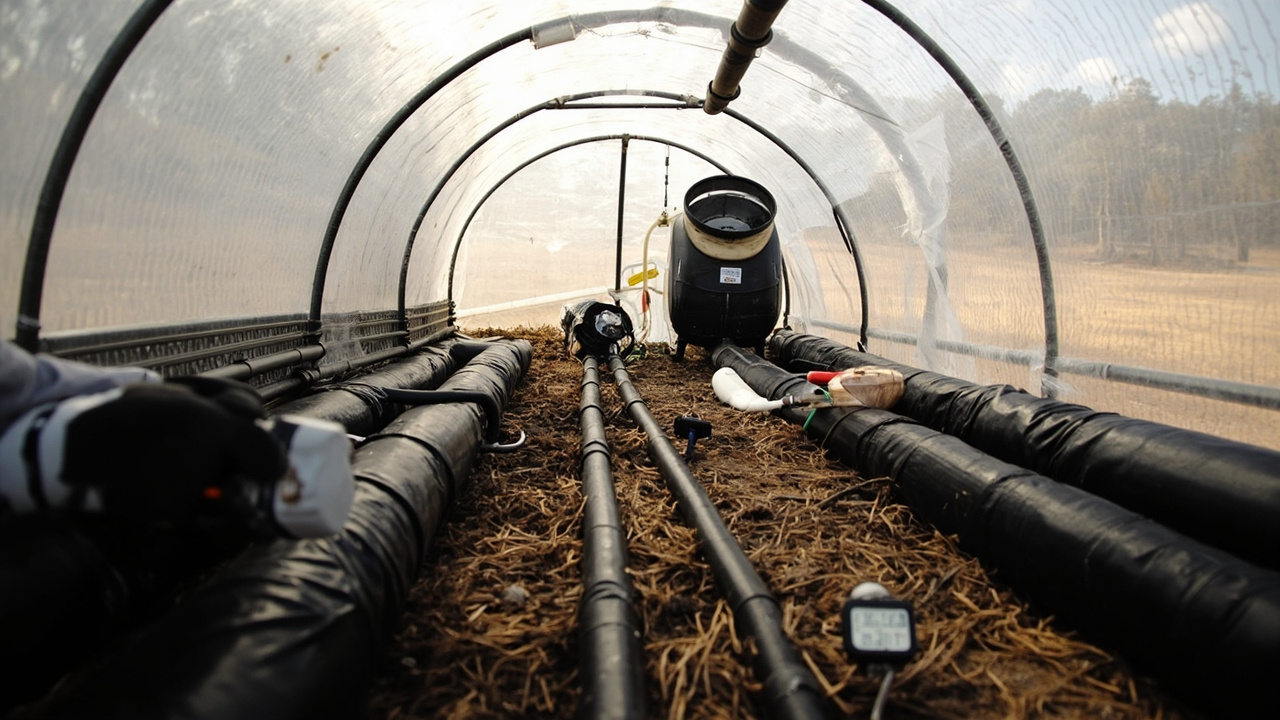
For the compost bay I boxed out a 2.4m x 1.2m x 1.2m bay using ACQ-treated pine sleepers, lined it with 25mm XPS foam board, and laid two 30-metre coils of 19mm rural poly pipe in horizontal loops, each coil fixed to a separate manifold so I could isolate a circuit if one turned slimy.
The total materials came to $1,870 at 2011 prices: $620 for polycarbonate and fixings, $340 for the slab, $280 for poly pipe and brass fittings, $180 for insulation, $170 for sleepers, and the rest in screws, silicone, and a secondhand 200-litre drum for a header tank. I filled the bay with 4 cubic metres of fresh horse manure mixed 3-to-1 with woodchips from a local arborist, wetted it until a handful dripped once when squeezed, and capped it with a 150mm layer of straw.
Three days later the heap hit 62°C, measured with a 600mm compost thermometer shoved into the core. Daytime ambient in the greenhouse that July averaged 7°C outside; inside the soil beds held 14°C at root level and the air sat at 18°C. The heat pulse tapered after 28 days, which is standard for a hot-compost pile of that volume, so I got into a rhythm of rebuilding the heap every four weeks through the cold months using manure from the same thoroughbred stables outside Drouin, who charge $20 a trailer load.
Pulling the poly pipe out of spent compost is a sticky job and the brass camlock fittings are worth the extra $12 each because you will be doing it in the rain at some point. A decade later that same greenhouse has grown winter tomatoes, chilli, and lettuce every year without a single watt of grid power, and the only repair has been replacing the polycarbonate fasteners after a hailstorm in 2019 sheared the cheap ones.
“I built a compost heater for my shed and watched it melt a plastic pipe in three days, proving my mistake was trusting rot to outlast a cold snap.”
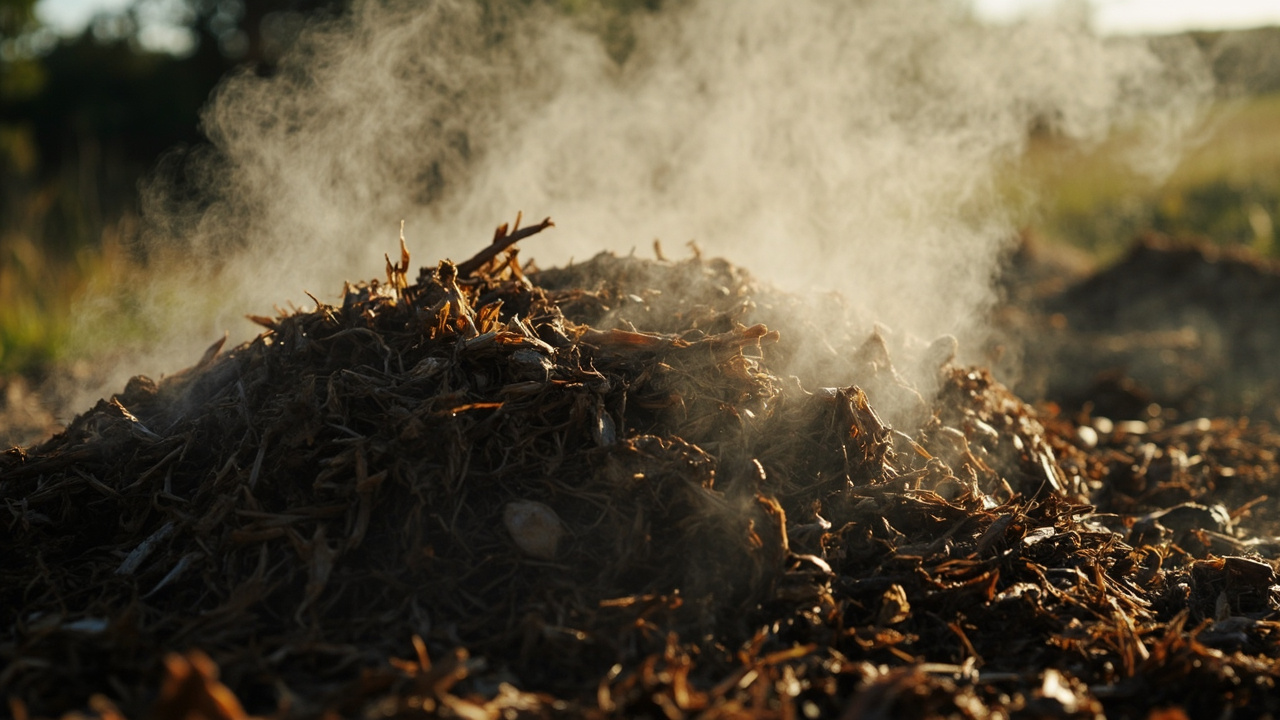
A cubic metre of fresh horse manure and straw bedding, the sort you’d fork out of a stable in the Southern Highlands or the Yarra Valley, will hit 55°C inside three days if the carbon-to-nitrogen ratio sits near 30:1. The core range for reliable greenhouse heating is 50–65°C, exactly the band where thermophilic bacteria multiply fastest. In a properly built pile, that temperature holds for two to three weeks before dropping, which lines up with winter’s coldest snaps here.
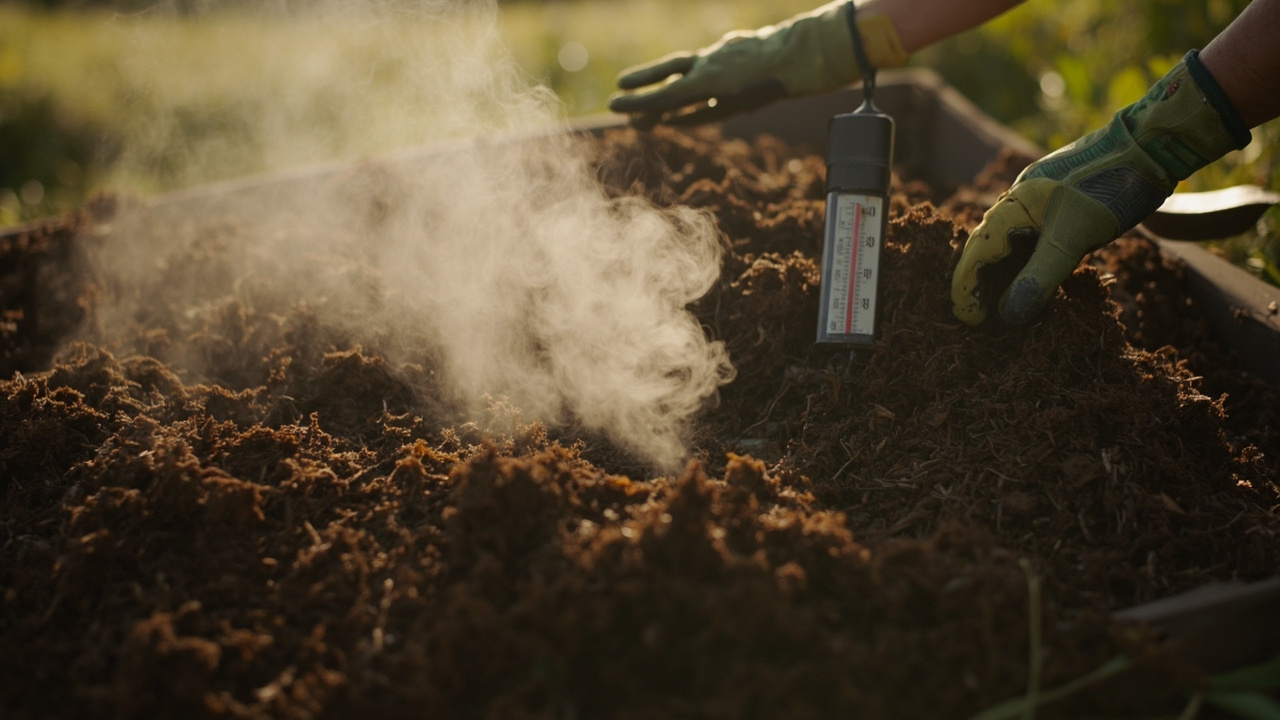
A 500 mm probe thermometer from any rural supply store costs about $30 and lets you track the heat without turning the pile. The pile itself doesn’t care about grid power. A sheet of black builders plastic over the top keeps rain from waterlogging the heap and sends a visible wisp of steam into the greenhouse air on a frosty June morning in Gippsland.
Dumping a pile in the corner gives you a cold, sludgy mess by August. A system that still reads 45 °C on the probe when Hobart mornings hit 2 °C needs three parts: an insulated compost bay, a water loop, and a heat-release bed. The bay I use now is a 2.4-metre-diameter ring of 1.8-metre-high zincalume corrugated sheet, lagged with a 50 mm layer of rockwool blanket held on with plumber’s strap.
Inside, I stack fresh horse manure and wood shavings from the local racing stables — they’re glad to get rid of it for a carton of Boag’s — in layers 300 mm thick, wetted until a handful drips once. A 3-cubic-metre pile like that will hit 60 °C within four days and stay above 40 °C for 12 to 14 weeks if you turn it once a month with a fork.
Cost for the bay in 2024: $210 for the corrugated iron (seconds from a rural salvage yard), $78 for a 3-metre roll of 50 mm rockwool from the big green shed, and $11 for a pack of Tek screws. The water loop is 30 metres of 19 mm polypipe coiled in a flat spiral that sits on a mesh shelf halfway up the pile.
I tie the coil to a circle of 100 mm-x-100 mm aviary mesh with zip ties, which stops it sagging into the muck and lets you lift the whole assembly out when it’s time to dig out finished compost. The pipe runs to a 25-litre drum outside the bay where a 12-volt DC circulation pump — a cheap submersible rated 600 litres per hour, $32 from any caravan supply joint — pushes water through at a slow walk.
Flow rate matters: too fast and the water doesn’t pick up heat, too slow and the compost cooks the pipe dry and cracks the poly. I settled on about 90 litres per hour after burning out one pump and replacing 4 metres of brittle pipe. The heat-release bed is a 1.2-metre-by-2.4-metre raised box made from 200-mm-x-50-mm cypress sleepers ($19 per metre from a timber yard in Geeveston) filled with 150 mm of coarse river sand. The polypipe from the compost bay runs back and forth through the sand in eight parallel runs, then returns to the drum.
Seeds in flats sit directly on the sand; the sand stores heat through a cloudy day and lets it go slowly at night. Soil temperature at tray level holds between 16 and 22 °C with an outside air temperature
Blunt tip: Your compost pile must be at least 1m x 1m x 1m. Smaller and it sheds heat faster than a tin shed in a July frost. That cube holds roughly a tonne of damp material—enough thermal mass to sustain the microbial burn for weeks, not days. Use 50% manure (cow or sheep, the fresher from the yards the better) and 50% straw. In my part of Gippsland, small square bales of wheaten or oaten straw run $12–18 each at the rural co-op. A cubic metre might swallow six to eight bales, depending how tight you pack them.
No meat scraps. They bring blowflies, neighbourhood dogs, and a stink that travels further than you think. Keep the whole thing moist like a damp sponge. Grab a handful and squeeze—you want a drop or two of water showing, no more. Too dry and the centre stalls; too wet and the pile goes slimy and anaerobic, reeking of rotten eggs instead of earthy heat. Workable moisture plus that 50/50 mix gives the bacteria enough nitrogen from the manure and carbon from the straw to hit 60–70°C inside three days.
I duct that heat into a 6×3-metre tunnel house and hold 18°C through a Gippsland winter while the outside gauge reads 4°C. The heap I built last August ran hot for just over eight weeks before dropping below 40°C and needing a turn.
A compost-heated greenhouse isn't a set-and-forget system. You need to check it weekly. Out here in the Strathbogie Ranges, every Saturday morning I push a 600 mm probe thermometer into the centre of the 12-cubic-metre bay. If the dial reads below 45°C, the pile has stalled. The usual culprit is low moisture—wood chips feel dry and dusty—so I run the dripper line for 20 minutes until a squeezed handful yields a single drop. If the core is wet but cold, the mix has gone anaerobic and the ammonia smell will back you off.
I fork the whole bay, layer in a 20-litre bucket of blood-and-bone at $18 a bucket, and turn it with a broadfork. Within 48 hours the temperature climbs back past 55°C. The outer
Forget importing expensive kits. You can build this with stuff you already have. But if you want a head start, a 6-metre by 3-metre greenhouse frame in 90x45mm MGP10 pine and galvanised stirrups runs around $300 at trade price from a Mittagong timber yard. Polycarbonate sheeting—10mm twinwall, UV-stabilised on
The 1 m³ flat-pack steel compost bin sitting in the Bunnings aisle for $120–$250 is the one you want. It usually comes as four corrugated zincalume or galvanised panels, a lid, and a packet of zinc-plated tek screws. You’ll drill it together in half an hour, then curse the sharp edges you forgot to file. Plastic dalesford-style bins cost less but they sag. I pulled a warped black plastic cone out of a paddock heap that had hit 60°C in the core; the sidewalls had gone soft and the lid wouldn’t sit. Steel doesn’t care.
A cubic metre of hot chook manure and straw will idle at 55–65°C for weeks, enough to warm a 12 m² greenhouse overnight without a single electrical watt. Bolting the bin together squarely matters. If the panels rack, the lid jams just when you need to fork the pile at 6 a.m. I bed mine on four second-hand concrete pavers to keep the bottom edge out of wet soil, because even galvanised steel will rust through after three winters in constant mud contact.
The 1 m³ size is a sweet spot: smaller and the thermal mass drops off too fast after the first flush; larger and you can’t turn the whole heap by hand without a four-day back. Fill it in alternating layers—roughly 150 mm of browns, 100 mm of greens, a sprinkle of dolomite—and the centre will hit 55°C inside four days. That’s hot enough to pasteurise seed-raising mix in a closed tin poked into the core, a trick that works exactly the same as the nursery-supply steam rigs but at zero running cost.
PVC pipes: $15 for 10m of 20mm pipe at Mitre 10. Get a 90° elbow for the heat exchanger.
A standard kitchen thermometer from Woolworths costs $12 and reads from -10 °C to 110 °C. That covers the useful range for compost monitoring, where a healthy hot pile sits between 55 °C and 70 °C. The probe is stainless steel, about 130 mm long, which reaches far enough into a pile to give a core reading without your knuckles grazing steaming woodchips. I keep mine in a length of 20 mm conduit clipped to the greenhouse frame so the cable doesn't end up tangled in a wheelbarrow.
The battery lasts a full season if you remember to switch it off between jabs. Push it in until only the cable shows, wait 30 seconds, and the display steadies. That’s cause-and-effect feedback you can act on: a drop below 45 °C means turn the pile or feed it fresh horse manure. No need for a logger or a Bluetooth probe that sends alerts to your phone while you're standing right there with a pitchfork. The Woolworths unit gets washed under the tap after a brew day and goes back in the drawer. It works.
An imported “compost heat kit”—typically a coil of polyethylene pipe, a low-wattage circulation pump, and a basic thermostat packed in a branded box—costs about $2,500 AUD landed. That is 10x more than the $250 you will spend on 100 metres of 25mm rural polypipe, a salvaged 44-gallon drum for the water jacket, and a 12V bilge pump off the shelf at Bunnings. Building the heat exchanger yourself is simpler than wiring a solar panel.
Lay the polypipe in a flat spiral inside the drum, plumb it to the pump with garden-hose fittings, and bury the drum in the centre of a fresh heap of horse manure and wood shavings mounded to roughly 2.5 metres across and 1.8 high. When the pile reaches 55 °C after three or four days, the pump cycles water through the spiral, picking up heat and sending it to a loop of 19mm dripper line pushed into the seedling beds.
A well-fed pile the size of a small ute holds 55–65 °C for eight to ten weeks, and the warm water keeps the root-zone temperature above 10 °C on a frosty July morning in Gippsland. No airfreight, no customs paperwork, just a trip to the shed.
Works like a charm in:
Won’t work if:
Worth a watch: FREE passive heating a greenhouse with compost · gregpryorhomestead
Yeah, properly. My hot bed hit 55°C inside a week and held that for about a month before I needed to turn it. On a minus three night out in the paddock, the air inside the greenhouse stayed above 5°C - enough to keep most frost-tender stuff alive.
A well-built hot bed will give you about a month of solid heat before you need to turn it. After that the temperature drops as the microbes finish their work, and you'll want to rebuild with fresh manure and straw to keep things cooking through winter.
My frame was 90x45 MGP10 treated pine at $8.50 a metre from a yard out at Wendouree, and the whole skeleton came in at $340. That was just the timber though - the polycarbonate glazing, screws, and pipe are separate costs.
Yep, I built the whole thing solo with an 18-volt impact driver and a circular saw, standing on dirt north of Bendigo. No need for fancy joinery - I just used lapped joints and hot-dipped galvanised framing nails, with every noggin flush and brace cut square.
While many off-grid projects are achievable as DIY, certain situations require licensed professionals:
Always check local regulations and obtain necessary permits before commencing work.